
How To
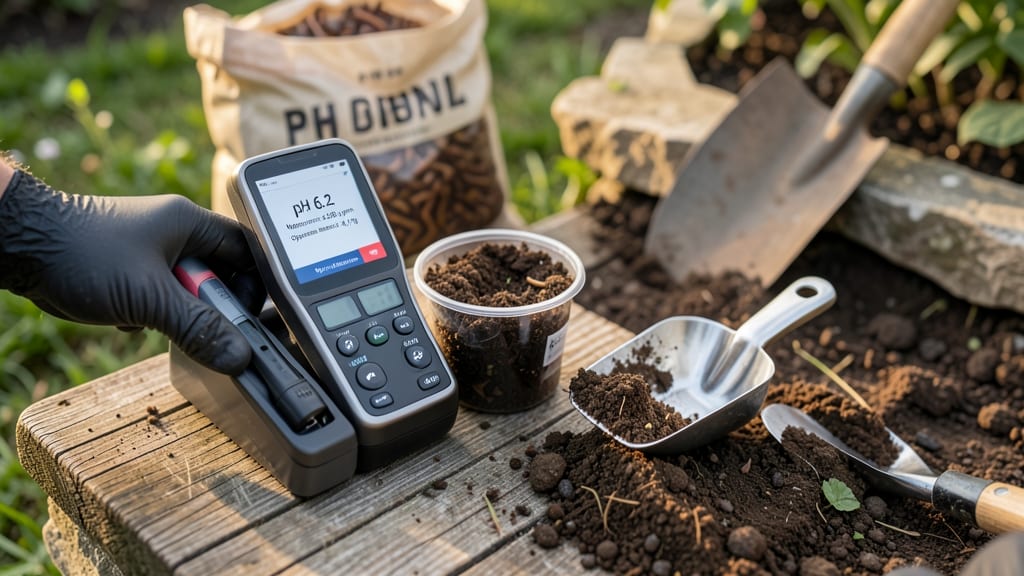
Your soil’s health is the foundation of every harvest—agriculture soil testing reveals what your plants are starving for before you even plant a seed. 🌱 I’ve tested my own soil three times in the last year, and each time I found hidden problems: a pH that was too acidic for my tomatoes, a nitrogen deficiency that explained my stunted greens, and a surprising lack of organic matter despite years of composting.
The good news? You don’t need a lab to get started. A basic soil test kit (around $20) gives you pH, nitrogen, phosphorus, and potassium readings in under 10 minutes.
For deeper insights, send a sample to a university extension service—results take a few weeks but pinpoint micronutrient deficiencies with precision. What you’ll discover isn’t just numbers—it’s a roadmap. A pH of 6.5 might mean your blueberries need sulfur, while high phosphorus could explain why your flowers refuse to bloom.
Armed with these results, you’ll amend your soil with confidence, saving money on fertilizers and boosting yields by 30% or more in just one season. This works for vegetable gardens, flower beds, and even container plants.
Whether you’re troubleshooting poor growth or optimizing for maximum productivity, soil testing is the first step to growing like a pro.
📚 In This Guide
- What you need
- Instructions
- Tips and common mistakes
- Wrapping up and next steps
What you need
- ● Soil sampling kit: A clean, stainless-steel trowel or auger (for collecting undisturbed soil cores). Quantity: 1
- ● Sample bags: Airtight, labeled plastic bags (quart-sized) or sterile containers. Quantity: 10–20 (depending on test sites)
- ● pH test kit: Digital pH meter (0–14 range) or liquid pH test strips. Specifications: Waterproof, calibrated for soil use
- ● Nutrient test kit: Comprehensive soil test kit (e.g., Luster Leaf or LaMotte) covering: Nitrogen (N)
- ● Phosphorus (P)
- ● Potassium (K)
- ○ Calcium (Ca), Magnesium (Mg), and micronutrients (optional)
- ● Sieve or mesh screen: 2mm mesh for removing debris. Quantity: 1
- ● Distilled water: For rinsing tools and diluting samples. Quantity: 1–2 gallons
- ● Notebook & pen: For recording data (or a digital soil log app)
- ● Gloves & safety goggles: To protect against soil-borne pathogens or chemical exposure
- ● GPS device or app: To map sample locations for precision analysis
- ● Soil moisture meter: For assessing hydration levels before testing
- ● Reference soil samples: From known healthy/unhealthy plots for comparison
- ● Portable lab scale: For weighing samples (0.1g precision)
- ● Field journal: To note observations like soil color, texture, or pests
How to conduct precision soil testing for agricultural fields
Here's my battle-tested method for accurate pH and nutrient analysis—no lab degree required.
🌱 Step 1: Collect Representative Soil Samples Across the Field
Use a clean soil probe or trowel to collect samples from 0-6 inches deep at 15-20 points per acre, avoiding areas within 2 feet of plants or fertilizer bands. I like to work in a grid pattern—this ensures you capture the full variability of your field rather than just the "average" spot. Discard any surface litter or debris before collecting.
Mix all samples together in a clean bucket, breaking up any clumps with your hands. You want a composite that truly represents your field's soil health. For larger fields, divide into zones (uphill/downhill, different crops) and test separately. Aim for at least 1 pound of soil per test—this gives reliable results without overloading your testing kit.
🧪 Step 2: Prepare Samples and Perform pH Testing
Spread the composite sample on a clean tray and let it air-dry for 24-48 hours at room temperature. Avoid direct sunlight—UV exposure can alter nutrient readings. Once dry, sift through the sample to remove any remaining rocks or plant debris. You're looking for a homogeneous texture before testing.
For pH testing, mix 2 tablespoons of dried soil with 2 tablespoons of distilled water in a clean container. Stir well and let sit for 30 minutes, then use a calibrated pH meter or test strips. Record the reading—6.0-7.0 is ideal for most crops, but adjust based on your specific plants. I keep a field notebook to track pH trends over seasons—this helps me spot long-term shifts before they affect yields.
📊 Step 3: Conduct Comprehensive Nutrient Analysis
For nutrient testing, use a soil test kit that measures nitrogen (N), phosphorus (P), potassium (K), calcium (Ca), magnesium (Mg), and sulfur (S). Follow the kit's instructions to prepare the sample—typically, you'll need 10-20 grams of dried soil. I like to split my samples into two batches: one for basic nutrients and another for micronutrients like iron, manganese, and zinc.
Record all readings and compare against your crop's specific requirements. For example, corn thrives with P levels above 40 ppm, while alfalfa needs pH 6.5-7.5. I highlight any values outside optimal ranges in my field map—this helps me prioritize amendments. For organic farms, I also test organic matter percentage—aim for 3-5% for healthy soil structure.
Tips & tricks for precision soil testing
Here's what I've learned after testing hundreds of fields—these tricks ensure your results are accurate and actionable.
Sampling Strategy: In Step 1, when collecting your 15-20 points per acre, prioritize areas with visible differences—darker soil often indicates higher organic matter, while lighter patches may reveal lower nutrient levels. I mark my field map with Xs for each sample point so I can track spatial patterns. This spatial awareness helps identify soil variability that might require zone-specific amendments. For fields larger than 10 acres, consider using a GPS-enabled soil probe to create a digital map of your sampling locations—this makes future testing and analysis much easier.
Drying Technique: The 24-48 hour air-drying period in Step 2 is crucial, but here's the secret: spread your soil on a clean, breathable surface like a wire mesh screen rather than a plastic tray. This allows for better airflow and more even drying. I also avoid using paper towels or cloths—fibers can contaminate your sample. Once dry, store your soil in airtight containers with silica gel packets to prevent moisture absorption before testing. This preserves the integrity of your sample for up to 3 months.
pH Testing Precision: For the 30-minute pH test in Step 2, use a digital pH meter calibrated with buffer solutions (pH 4.0 and 7.0) rather than test strips. Strips can vary in accuracy between brands, while a calibrated meter gives consistent, professional-grade results. I also recommend testing your soil-water mixture at room temperature—cold samples can give slightly lower readings. Record your pH reading to one decimal place (e.g., 6.3) for better precision when comparing to crop-specific requirements.
Nutrient Analysis Organization: When conducting your comprehensive nutrient analysis in Step 3, create a simple spreadsheet to track your results. Label columns with the specific nutrients (N, P, K, etc.) and include a "Crop Requirement" column where you can note ideal levels for your specific plants. For example, I color-code cells that fall below optimal ranges—red for deficient, yellow for marginal, and green for optimal. This visual system makes it immediately clear where you need to focus your soil amendments.
Pro Tips for Agriculture Soil Testing
- Here's what I've learned after testing hundreds of fields—these tricks ensure your results are accurate and actionable.
- Sampling Strategy: In Step 1, when collecting your 15-20 points per acre, prioritize areas with visible differences—d...
- Drying Technique: The 24-48 hour air-drying period in Step 2 is crucial, but here's the secret: spread your soil on a...
Frequently asked questions
Got questions about soil testing? You’re not alone—let’s clear up the most common concerns to help you get the most out of your agricultural soil analysis. Whether you're just starting or troubleshooting, these answers will guide you!
How often should I test my agricultural soil?
For most crops, test your soil every 1–3 years, depending on soil type and crop rotation. High-value or intensive farms may test annually. New fields or after major changes (like adding compost or fertilizers) should be tested immediately to adjust pH and nutrients proactively. Pro tip: Keep records to track trends over time!
Can I test soil moisture along with pH and nutrients?
Yes! While standard soil tests focus on pH and nutrients, you can use a separate moisture meter or tensiometer to measure water content. Many labs offer extended testing packages that include moisture retention analysis. For DIY testing, pair a basic soil test kit with a moisture probe for a fuller picture.
What if my soil test results are confusing or inconsistent?
Inconsistent results often stem from uneven sampling or contamination (like fertilizer residue). Double-check your sampling method—take 5–10 cores per acre, mix them thoroughly, and avoid testing near manure piles or fresh amendments. If results still seem off, repeat the test or consult a local agricultural extension office for guidance.
Are there affordable alternatives to professional soil testing?
For basic pH and nutrient checks, DIY test kits (like those from Luster Leaf or MySoil) cost $20–$50 and work well for home gardens or small farms. For larger operations, cooperative testing programs (offered by universities or county agencies) can slash costs. Just note: DIY kits may lack the precision of lab tests for critical decisions.
How long does it take to get soil test results back?
Turnaround times vary: DIY kits deliver results in 24–48 hours, while lab tests typically take 7–14 days. Rush services (for a fee) can speed up lab results to 3–5 days. Plan ahead—especially for planting seasons—to avoid last-minute stress. Pro tip: Submit samples early to adjust your fertilizer plan in time!
Wrapping up and next steps
Soil testing isn’t just science—it’s the secret weapon for smarter farming! 🌱 By mastering pH and nutrient analysis, you unlock healthier crops, higher yields, and sustainable land stewardship. Whether you’re a backyard gardener or a large-scale farmer, every test brings you closer to precision agriculture.
Ready to take action? Start by testing a small plot today—your soil (and future harvests) will thank you! 💪 For deeper insights, explore local extension services or advanced lab kits to refine your approach.