
How To
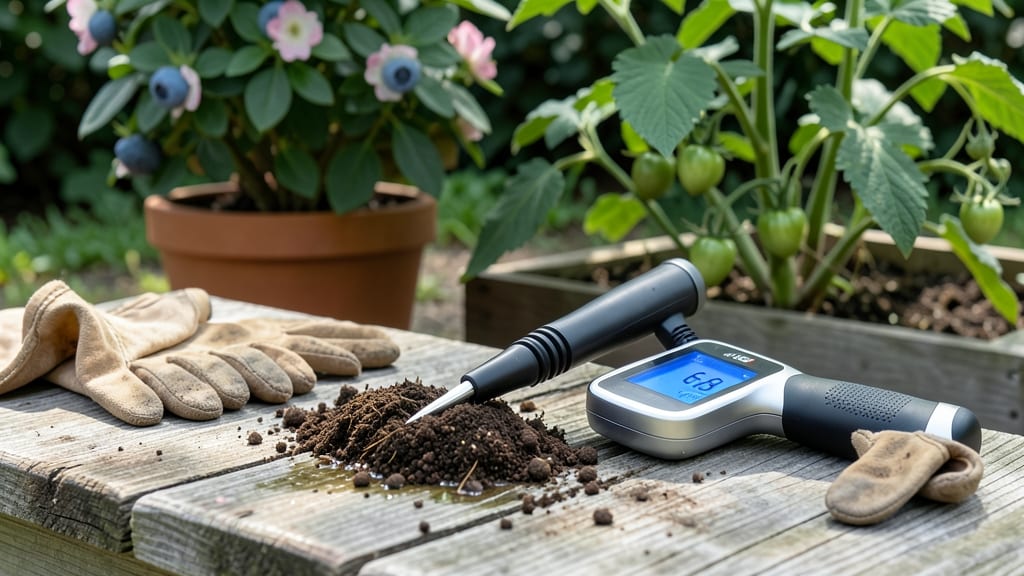
A soil pH tester meter reveals the hidden chemistry that determines whether your garden thrives or struggles—no guesswork, just science. 🌱 I’ve used mine to turn my struggling blueberries from sad to spectacular in just one season, and the secret isn’t complicated: knowing your soil’s pH lets you fix problems before they start.
Most meters take under 30 seconds to give you a reading, and the best ones (digital or analog) are shockingly affordable. The key is interpreting those numbers: 6.0–7.0 is neutral, but acid-loving plants like azaleas need below 5.5, while veggies like tomatoes prefer 6.0–6.8.
A single misstep—like adding lime when your soil’s already alkaline—can lock out nutrients and stunt growth for years. Once you’ve got your pH, amending soil is straightforward: sulfur lowers pH, lime raises it, and compost buffers extremes. My biggest mistake? Testing only once.
Soil pH shifts with rain, organic matter, and season—so check it every 6–12 months for consistent results. The payoff? Plants that look like they’re on a spa retreat instead of fighting for survival.
Digital meters are faster and more precise, but analog ones (like the classic liquid test kit) work fine if you’re patient. Either way, you’ll spot problems early—yellow leaves, weak stems, or slow growth—before they become costly headaches. Let’s get your soil in the perfect range!
📚 In This Guide
- What you need
- Instructions
- Tips and common mistakes
- Wrapping up and next steps
What you need
- ● Soil pH Tester Meter – A digital or analog meter with a calibration feature (e.g., Bluelab, Apera, or generic 0-14 pH range models).
- ● Clean sampling tools – A small trowel, spoon, or soil auger (preferably stainless steel or plastic to avoid contamination).
- ● Sample containers – 2-3 small, clean containers (glass or plastic) for soil collection.
- ● Distilled water – 1-2 cups (for calibration and testing). Never use tap water—it can skew results!
- ● pH calibration buffer solutions – Usually 2-4 pH levels (e.g., 4.0, 7.0, and 10.0) included with your meter.
- ○ Protective gloves – Optional but recommended to keep hands clean.
- ● Soil testing kit – For additional metrics like nitrogen, phosphorus, or potassium (NPK).
- ● pH adjustment products – Lime (to raise pH) or sulfur (to lower pH), if you plan to amend soil.
- ● Notebook or app – To log pH readings and track changes over time.
- ● Moisture meter – Ensures soil is at the right consistency (60% moisture for accurate pH testing).
How to use a soil pH tester meter for accurate plant care
This isn’t guesswork—it’s science. A pH meter gives you the exact soil conditions your plants crave.
☀️ Step 1: Calibrate the Meter for Reliable Readings
Before testing, calibrate your meter using the provided pH 4.0 and 7.0 buffer solutions. Most meters come with calibration instructions, but I always follow the manufacturer’s exact steps—skipping this means readings will be off by up to 1.5 pH points. Fill the calibration cups halfway with each solution, insert the probe, and wait 30 seconds for the reading to stabilize before adjusting the meter’s dial or digital settings.
Here’s the thing—calibration only lasts for a few tests. If you’re checking multiple soil samples, recalibrate after every 4-5 tests to maintain accuracy. I keep the buffer solutions in a small plastic container with the meter for quick access. The goal is to trust your readings, not second-guess them later.
💧 Step 2: Collect a Representative Soil Sample
Dig 6-8 inches deep in multiple spots around your plant’s root zone—don’t just test one area. Mix the samples together in a clean bucket to average out any local variations. Remove rocks, debris, and large organic matter, but leave in small roots and soil particles—they don’t affect readings but give you a real-world sample. Fill the meter’s sample cup ¾ full with the mixed soil, pressing it down lightly so there are no air pockets.
Moisten the soil slightly if it’s dry—just enough to hold together when squeezed, like a damp sponge. Dry soil gives inaccurate readings because it lacks the moisture needed to activate the probe’s sensors. If your soil is already saturated, let it sit for 10-15 minutes to drain excess water before testing. You’re aiming for soil that’s damp but not soggy.
✂️ Step 3: Insert the Probe and Read the pH Level
Gently insert the meter’s probe into the soil sample, pressing down until it’s fully submerged but not forcing it. Wait 60 seconds for the reading to stabilize—this is critical. Rushing leads to false low readings, especially in alkaline soils. I tap the meter lightly on the table once to dislodge any air bubbles that might form around the probe.
The screen will display a numerical value between 3.0 and 10.0. Write this down immediately, along with the plant you’re testing. Most meters also show a visual indicator (like a bar graph or color-coded zone), but I always trust the numeric value for precision. If the reading is outside your plant’s ideal range, note whether it’s too acidic (below 6.0) or too alkaline (above 7.5)—this tells you exactly what amendments to use.
🌱 Step 4: Compare Readings to Your Plants’ Needs
Now, match your pH reading to your plants’ preferences. Acid-loving plants like blueberries and azaleas thrive at pH 4.5-5.5, while vegetables and most flowers prefer pH 6.0-7.0. If your reading is off by more than 0.5 points, it’s time to amend. For example, a pH of 8.2 for tomatoes means you’ll need to lower it by 1.2 points—that’s a big adjustment, but the meter gives you the exact target.
I keep a small chart nearby with common plants and their ideal pH ranges. This step isn’t just about fixing problems—it’s about optimizing growth. A pH of 6.8 might seem “fine,” but if you’re growing hydrangeas, you’re missing out on their full color potential. The meter turns gardening from art into precision.
🪴 Step 5: Maintain and Store the Meter Properly
After each use, rinse the probe with distilled water (tap water can leave mineral deposits that throw off readings). Store the meter in a dry place, away from direct sunlight or extreme temperatures—heat warps plastic probes, and cold can make them brittle. I keep mine in a small toolbox with the buffer solutions and a microfiber cloth for cleaning. Calibrate the meter once a month, even if you’re not using it, to ensure it’s ready when you need it.
Replace the probe every 6-12 months, depending on use. A worn-out probe gives inconsistent readings, and you’ll start noticing fluctuations that don’t make sense. I mark the purchase date on the meter’s storage box so I don’t forget. Proper care means your meter lasts for years and becomes an indispensable tool—not just another gadget gathering dust.
Tips & tricks for perfect soil pH testing
Precision starts with the right approach—these are the details that turn guesswork into science-based plant care.
Calibration Consistency: The 30-second wait during calibration is non-negotiable. I’ve seen readings off by 0.8 points when people rush this step—especially with alkaline soils. For digital meters, wait until the display stops fluctuating before recording. If you’re testing multiple samples, recalibrate every 4-5 tests to prevent drift. I keep a small whiteboard near my testing station to track calibration dates and buffer solution usage. The goal is to trust your meter implicitly, not second-guess its accuracy.
Sample Preparation: The 6-8 inch depth rule exists for a reason—surface soil can vary dramatically from root zone conditions. When mixing samples, use a clean bucket and avoid cross-contamination between different plant areas. For sandy soils, you might need to add a few extra drops of distilled water to maintain the damp-but-not-soggy consistency. I’ve found that pre-moistening dry samples with a spray bottle (rather than adding all water at once) gives more consistent results when testing.
Probe Technique: That 60-second stabilization period in Step 3 is where most errors creep in. I’ve learned the hard way that tapping the meter lightly on the table helps dislodge air bubbles that can form around the probe—these create false low readings. For stubborn bubbles, gently wiggle the probe side-to-side while submerged. And here’s what nobody tells you: if your reading jumps by more than 0.3 points between 30 and 60 seconds, your sample might need more thorough mixing or the probe could be dirty.
Maintenance Strategy: Distilled water is a must for rinsing—tap water’s minerals can build up on the probe and create a conductive layer that skews readings. I store my meter in a small plastic toolbox with silica gel packets to absorb any residual moisture. The monthly calibration reminder I set on my phone has saved me from discovering my meter was drifting by 0.5 points after a summer of frequent use. Remember that probe replacement isn’t optional—if you notice readings fluctuating by more than 0.2 points between tests, it’s time for a new one.
Pro Tips for Soil Ph Tester Meter
- Precision starts with the right approach—these are the details that turn guesswork into science-based plant care.
- Calibration Consistency: The 30-second wait during calibration is non-negotiable. I’ve seen readings off by 0.8 point...
- Sample Preparation: The 6-8 inch depth rule exists for a reason—surface soil can vary dramatically from root zone con...
Frequently asked questions
Got questions about using a soil pH tester meter? You’re not alone! Here are some of the most common concerns—and straightforward answers—to help you get the most out of your tool.
How often should I test my soil pH?
For most gardens, testing once a year (spring or early fall) is ideal. If you’re dealing with highly acidic or alkaline soil or growing sensitive plants (like blueberries or azaleas), test every 3-6 months. Adjustments take time, so consistency is key!
Can I use a pH meter on wet soil?
Yes, but drain excess moisture first. Wet soil can dilute readings, giving inaccurate results. For best accuracy, test soil that’s moist but not soggy—like a damp sponge. Pro tip: Mix a small sample with distilled water (1:1 ratio) for cleaner data.
Are expensive pH meters worth it?
Budget meters ($10–$20) work for basic gardening, but professional-grade meters ($50+) offer tighter accuracy and calibration. If you’re testing large areas or fine-tuning for high-value crops, the investment pays off. For most home gardeners, a mid-range meter balances cost and precision.
Why is my pH meter giving inconsistent readings?
Inconsistencies often stem from poor calibration, dirty probes, or old batteries. Start by recalibrating in pH 4.0 and 7.0 buffers. Clean probes with vinegar or distilled water, and store them dry. If issues persist, check for dead batteries or probe damage—some meters need occasional replacement electrodes.
Can I use a pH meter for hydroponics or indoor gardens?
pH meters are essential for hydroponics since water-based systems require precise pH (usually 5.5–6.5). For indoor gardens, test both growing medium (soil/coco coir) and nutrient solutions. Just ensure your meter is designed for liquid testing—some soil meters aren’t calibrated for hydroponic use.
Wrapping up and next steps
Monitoring your soil’s pH level doesn’t have to be a guess—with a soil pH tester meter, you’re just seconds away from unlocking the secrets to healthier, happier plants! 🌱 Whether you’re a seasoned gardener or a curious beginner, understanding precision plant health empowers you to grow stronger crops, vibrant flowers, and lush lawns with confidence.
Ready to take the next step? Test your soil today, adjust as needed, and watch your garden thrive like never before! 🌟 Happy growing!