
How To
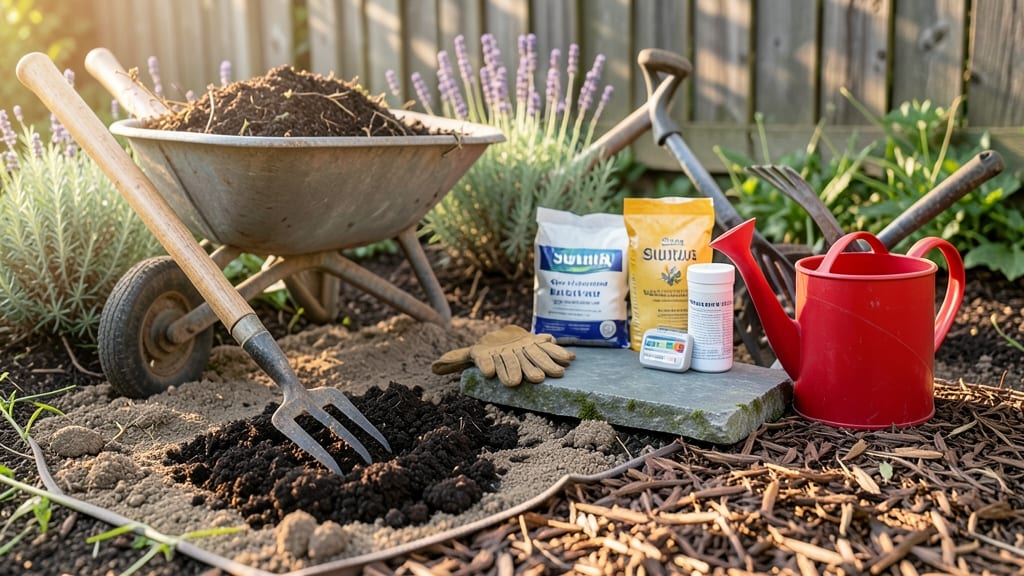
Your plants' success starts with how to prepare soil for planting—before the first seed goes in the ground. Creating a loose, nutrient-rich foundation where roots can thrive is the key to transforming struggling seedlings into robust plants that produce all season long.
The difference between a garden that thrives and one that barely survives often comes down to what’s happening below the surface.
Start by testing your soil’s pH and texture—most garden centers offer cheap kits, or you can send a sample to your local extension office. Amend with compost or aged manure (2-3 inches mixed into the top 6-12 inches of soil) to improve fertility and structure.
For heavy clay, work in sand or perlite to boost drainage, while sandy soils benefit from peat moss or coconut coir to retain moisture. The goal? Soil that crumbles easily when damp and holds moisture without staying soggy.
Loosening the soil—whether by tilling, hand-forking, or no-till methods—breaks up compaction and encourages root growth. For vegetables and flowers, aim for a 6-inch-deep working layer, while shrubs and perennials need deeper prep (12+ inches) to establish strong root systems.
The payoff? Plants that establish faster, resist disease better, and produce healthier, more abundant harvests—exactly what you want from your garden.
Season matters too: prep 4-6 weeks before planting in spring or early fall for cool-season crops, or 2-3 weeks before warm-season plants go in. And here’s the secret—over-prepping is worse than under-prepping.
Focus on one season at a time, and your soil will reward you with years of productivity. Ready to get started?
📚 In This Guide
- What you need
- Instructions
- Tips and common mistakes
- Wrapping up and next steps
What you need
- ● Garden fork or broadfork: A sturdy, bypass-pronged fork (18–24 inches long) to loosen compacted soil without turning it.
- ● Garden trowel or spade: A stainless steel trowel (6–8 inches) for precision work, or a heavy-duty spade (12–14 inches) for larger areas.
- ● Rake (bow or leaf rake): A bend-resistant rake (18–24 inches wide) to level and smooth soil after loosening.
- ● Garden hose with adjustable nozzle: For thorough watering (preferably with a showerhead attachment for gentle saturation).
- ● Compost or well-aged manure: 2–3 inches of finished compost (or 1–2 inches of aged manure mixed with straw) per square foot.
- ○ Organic matter amendments (optional but recommended): Peat moss or coconut coir (1–2 inches) for moisture retention.
- ● Perlite or vermiculite (½ cup per square foot) to improve drainage.
- ● Wood chips or straw (1–2 inches) to suppress weeds and retain moisture.
- ○ Soil test kit (optional but helpful): A DIY test kit (e.g., Luster Leaf or MySoil) to check pH and nutrient levels before planting.
- ● Weather window: Choose a day with mild temperatures (50–75°F) and no rain forecasted for 24–48 hours.
- ● Sunlight access: Ensure the area gets at least 6 hours of sunlight daily (adjust amendments for shade-loving plants).
- ● Soil type awareness: Identify if your soil is clay, sandy, or loamy—this dictates how much organic matter to add (clay = more compost; sandy = more peat/perlite).
- ○ Safety gear (optional but smart): Garden gloves (nitrile-coated for durability).
- ● Knee pads or a small stool for comfort.
- ● Dust mask (if working with heavy clay or old soil).
Step-by-Step guide to preparing soil for planting
Healthy roots start with the right foundation—here’s how to create a loose, nutrient-rich base that plants will thrive in.
Test Current Soil Conditions
Before making changes, assess your soil’s natural state. Dig a small hole about 6 inches deep and examine the texture—ideal soil should crumble easily when moist but hold its shape when dry. If it feels compacted or clumps tightly, it needs aeration. Check drainage by filling the hole with water; if it drains within 30 minutes, your soil is well-draining. If water pools, you’ll need to improve drainage.
Use a simple soil test kit to measure pH and nutrient levels. Most vegetables prefer a pH between 6.0 and 7.0, while acid-loving plants like blueberries thrive at 4.5 to 5.5. If your soil is too alkaline or acidic, amendments will correct it. I always test first—skipping this step can lead to wasted effort and poor plant performance.
Remove Debris and Loosen Compacted Soil
Clear the planting area of rocks, weeds, and old plant debris. Use a garden fork or broadfork to break up compacted soil without turning it over—this preserves the natural structure of soil layers. Work the fork 8-12 inches deep, leveraging it back and forth to create air pockets. Compacted soil restricts root growth, so this step is critical for long-term plant health.
If your soil is particularly dense, consider double-digging: after loosening the first layer, remove the topsoil, amend it, and then replace it over the improved subsoil. This method creates a deeper, more fertile root zone. Avoid using a shovel for deep loosening—it compacts soil further and disrupts the natural soil ecosystem.
Amend Soil with Organic Matter
Incorporate 2-4 inches of compost or well-rotted manure into the top 6 inches of soil. This boosts organic matter, which improves soil structure, water retention, and nutrient availability. I like to mix in 1-2 inches of aged compost for most garden beds, while heavier clay soils benefit from 3-4 inches. Spread the compost evenly, then use a garden fork or tiller to blend it into the soil.
For sandy soils that drain too quickly, add peat moss or coconut coir to help retain moisture. Clay soils benefit from perlite or coarse sand to improve aeration. Avoid fresh manure—it can burn plants due to high ammonia levels. Instead, use composted materials that have broken down into a dark, crumbly texture.
Balance Nutrients and pH
Adjust pH based on your test results. To lower pH (make soil more acidic), work in elemental sulfur or peat moss. For higher pH (more alkaline), add lime or wood ash. Follow package instructions for application rates—overcorrecting pH can harm plants. Mix amendments into the soil 2-3 weeks before planting to allow them to integrate fully.
Add a balanced fertilizer (like 10-10-10) or organic options such as bone meal, kelp meal, or worm castings to provide essential nutrients. I prefer organic fertilizers because they release nutrients slowly and improve soil health over time. Sprinkle the fertilizer evenly over the amended soil and work it in with a fork or tiller.
Level and Prepare for Planting
Rake the soil surface to create a smooth, level bed. Remove any remaining clumps or large particles. For rows, use a board or string line to create straight edges. Press down lightly with your hands or a rake to settle the soil—this prevents seeds or transplants from sinking too deeply when planted. The goal is a fine, crumbly texture that’s easy for roots to penetrate.
Water the soil thoroughly 1-2 days before planting to encourage root growth when you transplant. Moist soil is less stressful for plants and helps them establish quickly. If you’re planting seeds, keep the soil evenly moist until germination. For transplants, water deeply after planting to eliminate air pockets around the roots and promote strong attachment to the soil.
Tips & tricks for perfect soil preparation
Preparing soil properly is the foundation of a thriving garden—here's how to avoid common pitfalls and elevate your planting foundation.
Soil Test Accuracy: When testing your soil's drainage in Step 1, use a clear container to measure the 30-minute drainage time. I've found that adding a small amount of water at a time (about 1 cup) gives more consistent results than pouring all at once. This mimics natural rainfall patterns and helps you better assess how your soil handles water retention. The goal is to identify whether your soil drains too quickly or holds too much moisture—both extremes need correction.
Tool Selection Matters: In Step 2, while a garden fork is ideal for breaking up compacted soil, I've discovered that a broadfork works even better for deeper loosening without turning the soil over. The broadfork's design allows you to work 8-12 inches deep while preserving the natural soil structure. If you don't have either, a sturdy pitchfork can work in a pinch, though it may require more effort to achieve the same results. The key is to avoid shovels—they compact soil further and defeat the purpose of aeration.
Compost Layering Strategy: For Step 3, when incorporating 2-4 inches of compost, I recommend spreading it evenly across the surface first, then lightly raking before forking it in. This creates a more uniform distribution of nutrients throughout the 6-inch depth. For clay soils needing 3-4 inches, consider layering the compost in 1-inch increments with a fork between each layer to prevent compaction. The goal is to create a loose, crumbly texture that roots can easily penetrate—this often requires more than just mixing compost into existing soil.
pH Adjustment Timing: The 2-3 week waiting period in Step 4 before planting is crucial for pH amendments to integrate fully. I've learned that rushing this step often leads to uneven pH levels in the planting zone. For quick fixes when time is limited, you can reduce this to 1 week by mixing amendments more thoroughly and testing again before planting. However, this approach works best for small garden beds rather than large areas where thorough integration is harder to achieve.
Pro Tips for Prepare Soil For Planting
- Preparing soil properly is the foundation of a thriving garden—here's how to avoid common pitfalls and elevate your p...
- Soil Test Accuracy: When testing your soil's drainage in Step 1, use a clear container to measure the 30-minute drain...
- Tool Selection Matters: In Step 2, while a garden fork is ideal for breaking up compacted soil, I've discovered that ...
Frequently asked questions
Got questions about prepping your soil for planting? You’re not alone! Here are answers to the most common concerns—so you can get growing with confidence.
How often should I test my soil before planting?
Test your soil every 1-3 years (or sooner if you notice poor plant health). A simple DIY test kit or lab analysis helps track pH, nutrients, and organic matter. Fresh tests ensure you adjust for seasonal changes or past amendments.
Can I plant right after tilling or amending the soil?
Wait 1-2 weeks after tilling to let the soil settle and microbes recover. For heavy amendments (like compost or manure), give it 4-6 weeks to integrate. Rushing can compact the soil or disrupt root growth—patience pays off!
What’s a budget-friendly alternative to expensive soil amendments?
Try these free/cheap swaps:
- Compost: Use kitchen scraps (fruit/veggie peels, coffee grounds) or collect yard waste in a bin.
- Green manure: Plant nitrogen-rich cover crops (like clover) in fall, till them in spring.
- Crushed eggshells: Bake and grind for calcium (great for tomatoes/peppers).
My soil is full of worms—should I remove them before planting?
Nope! Earthworms aerate and fertilize soil naturally. Instead, protect them by:
- Avoiding deep tilling (stick to 6–8 inches).
- Watering gently to prevent washing out their tunnels.
- Adding mulch to keep soil moist (their happy place!).
Can I prepare soil in winter for spring planting?
Winter is perfect for:
- Cover crops: Plant clover or rye to prevent erosion and add nutrients.
- Compost tea: Brew and apply to wake up soil microbes.
- Raised beds: Build or refresh them early to warm up faster in spring.
What if my soil is too rocky or clay-heavy?
Don’t stress! Break up clay by:
- Adding 3–4 inches of compost and tilling shallowly (2–3 inches).
- Using gypsum (not lime!) to improve structure over time.
- For rocks, double-dig: Remove top 12 inches, mix with compost, then backfill.
Wrapping up and next steps
Preparing your soil for planting is the foundation of a thriving garden—whether you're nurturing veggies, flowers, or lawns. By testing, amending, and aerating thoughtfully, you’re giving your plants the perfect start to grow strong, healthy, and resilient. 🌱
Now that you’re armed with the know-how, roll up your sleeves and get planting! Start small with a single bed or pot, track your progress, and soon you’ll be a soil-prep pro. Happy gardening!