
Tools
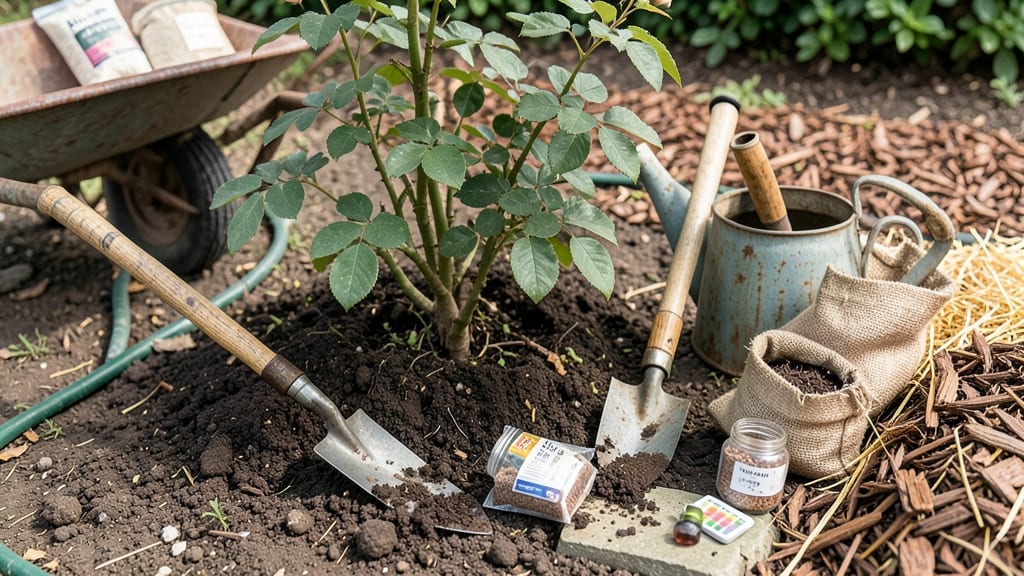
Your rose garden soil preparation starts with soil so loose and fertile, roses will fight to bloom. 🌹 I’ve learned the hard way that compacted, nutrient-poor soil means fewer flowers and more struggles—so I now prepare mine like a pro.
The secret? A mix that drains well but holds moisture, stays rich with organic matter, and balances pH to feed roots deeply.
Start by testing your soil’s pH (roses thrive at 6.0–6.5) and drainage—water should seep away in 1–2 hours. If your soil is heavy clay, amend it with 3–4 inches of compost and 1–2 inches of coarse sand or perlite to loosen it.
For sandy soil, mix in 2–3 inches of peat moss or coconut coir to retain moisture and nutrients.
Add a slow-release rose fertilizer at planting (follow package rates) and top-dress annually with 2–3 inches of compost in early spring. Mulch with 2–3 inches of organic mulch (like shredded bark) to protect roots, suppress weeds, and keep soil temperatures stable.
This prep ensures your roses grow strong stems, vibrant foliage, and abundant blooms all season. The key is consistency—maintain soil health yearly, and your garden will reward you with roses that turn heads. Ready to dig in?
📚 In This Guide
- What you need
- Instructions
- Tips and common mistakes
- Wrapping up and next steps
What you need
- ● Topsoil: 3–4 inches (7.5–10 cm) of high-quality, well-draining topsoil (compost-blended preferred). Quantity: ~1 cubic yard (0.75 cubic meters) per 100 sq. ft. (9.3 sq. m).
- ● Compost: Aged, organic compost (20–30% of the soil mix) to boost nutrients and structure. Quantity: 1–2 bags (40–60 lbs or 18–27 kg) per 10 sq. ft. (1 sq. m).
- ● Peat Moss or Coconut Coir: 10–20% of the mix for moisture retention and aeration. Quantity: 1–2 cubic feet (0.03–0.06 cubic meters) per 10 sq. ft.
- ● Perlite or Vermiculite: 5–10% for improved drainage and root aeration. Quantity: 1–2 gallons (3.8–7.6 L) per 10 sq. ft.
- ● Sand (coarse, horticultural-grade): 10–20% if your soil is heavy clay. Quantity: 1–2 bags (50 lbs or 23 kg) per 10 sq. ft.
- ● Bone Meal or Rose Fertilizer: 1–2 cups (250–500 mL) per 10 sq. ft. for phosphorus-rich nutrition.
- ● Lime (if soil is acidic): Test your soil first! Add 1–2 lbs (0.5–1 kg) of garden lime per 100 sq. ft. (9.3 sq. m) if pH is below 6.5.
- ● Garden Fork or Tiller: For turning and aerating soil deeply (8–12 inches or 20–30 cm).
- ● Shovel & Spade: One round-point shovel for mixing, one spade for edging.
- ● Rake (Bow or Leaf Rake): To level and smooth the soil surface.
- ● Garden Gloves: Heavy-duty to protect your hands from thorns and rough soil.
- ○ Soil pH Test Kit: Optional but highly recommended to tailor amendments.
- ● Wheelbarrow or Large Container: For hauling materials (minimum 3 cubic feet or 0.085 cubic meters capacity).
- ● Knee Pads or Pad: For comfort during long prep sessions.
- ● Test first! A simple soil test (DIY kits available) saves time and money by identifying pH and nutrient needs.
- ● Layer like a pro: Mix topsoil, compost, and amendments in a wheelbarrow before spreading to ensure even distribution.
- ● Amend clay soil gradually: Avoid over-sanding—aim for 10% sand max to prevent compaction.
- ● Mulch later: Keep 2–3 inches (5–7.5 cm) of mulch (like shredded bark) on hand for post-planting moisture retention.
Step-by-Step guide to preparing soil for a thriving rose garden
Here's how to create the perfect foundation for roses—loose, well-draining soil that encourages strong roots and stunning blooms.
🪴 Step 1: Clear and Test the Garden Area
Remove all grass, weeds, and debris from your 4-foot by 4-foot rose garden space. I like to use a garden fork to loosen the top 6 inches of soil first—this breaks up compacted layers that restrict root growth. If you have heavy clay soil, you'll notice it sticks to your fork and feels dense when squeezed.
Next, grab a soil test kit from your local garden center. Roses thrive in soil with a pH between 6.0 and 6.5. If your test shows different results, you'll need to adjust later. Mark the garden area with stakes so you remember where to amend the soil—this prevents accidental tilling in the wrong spot.
🌱 Step 2: Amend the Soil with Organic Matter
Spread 2 inches of compost evenly across the garden bed. I use a 5-gallon bucket to distribute it uniformly, working it into the top 6 inches of soil with a garden fork. This improves drainage and adds essential nutrients. For clay-heavy soil, mix in 1 part peat moss to 3 parts native soil—this lightens the texture and prevents waterlogging.
If your soil is sandy, blend in 2 inches of well-rotted manure or leaf mold instead. Work these amendments into the soil until it feels crumbly and airy. You should see small clumps form when you squeeze—this indicates good structure for rose roots. Avoid using fresh manure, as it can burn tender rose roots.
💧 Step 3: Add Slow-Release Fertilizer and Mulch
Sprinkle 1 cup of rose-specific granular fertilizer (like 10-10-10) over the amended soil. Work it into the top 3 inches using your garden fork. This provides a steady nutrient supply without overwhelming the plants. Water the area lightly to help the fertilizer settle into the soil.
Top the bed with 2 inches of organic mulch, such as shredded bark or straw. Keep the mulch 2 inches away from the base of any existing rose plants to prevent rot. This layer retains moisture, regulates soil temperature, and suppresses weeds. Water the entire bed until the soil is 6 inches deep and evenly moist.
☀️ Step 4: Final Soil Check and Planting Preparation
Dig a small hole—about 1 foot deep—in the center of the bed. Fill it with water and wait 30 minutes. If the water drains completely, your soil has excellent drainage. If it pools, add more compost or perlite to improve aeration. Well-draining soil is critical for roses—poor drainage leads to root rot and stunted growth.
Use a garden rake to smooth the soil surface, creating a slight depression in the center where you'll plant. This helps water flow toward the roots instead of pooling away. Now your rose garden soil is ready for planting—loose, nutrient-rich, and perfect for vibrant blooms.
Tips & tricks for perfect rose garden soil
These simple tricks will help you create the ideal foundation for your roses—soil that's loose, nutrient-rich, and ready for planting.
Soil Texture Test: After loosening the top 6 inches of soil in Step 1, squeeze a handful—it should crumble easily when dry and hold its shape when moist. If it sticks together like clay or falls apart like sand, you'll need to adjust with amendments. This simple test helps you determine whether to add peat moss for clay or leaf mold for sandy soil.
Compost Quality Matters: When spreading the 2 inches of compost in Step 2, look for dark, crumbly material that smells earthy—not sour or overly fresh. Well-aged compost breaks down slowly, providing nutrients over time. If your compost is still chunky, mix it with native soil before applying to ensure even distribution.
Fertilizer Placement: In Step 3, work the 1 cup of rose-specific fertilizer into the top 3 inches of soil, but avoid placing it directly against any existing rose roots. The goal is to create a nutrient-rich zone where new roots will grow. Lightly watering afterward helps the granules settle into the soil rather than floating on top.
Drainage Test: The 30-minute water test in Step 4 is your final quality check. If water drains completely, you're good to go. If it pools, add more perlite or coarse sand to improve aeration. This simple test prevents root rot and ensures your roses get the oxygen they need to thrive.
Pro Tips for Rose Garden Soil Preparation
- These simple tricks will help you create the ideal foundation for your roses—soil that's loose, nutrient-rich, and re...
- Soil Texture Test: After loosening the top 6 inches of soil in Step 1, squeeze a handful—it should crumble easily whe...
- Compost Quality Matters: When spreading the 2 inches of compost in Step 2, look for dark, crumbly material that smell...
Frequently asked questions
Got questions about prepping the perfect soil for your rose garden? You’re not alone! Here are some of the most common concerns—and straightforward answers—to help you get started with confidence.
When is the best time to prepare rose garden soil?
Ideally, prepare your soil 6–8 weeks before planting in early spring or fall. This gives microbes time to break down organic matter and improves drainage. For container roses, amend soil at planting time. Avoid working wet soil—wait for dry, workable conditions to prevent compaction.
Can I use regular garden soil for roses?
Regular garden soil is often too dense or lacks nutrients for roses. Amend it with 50% compost, 30% topsoil, and 20% sand or perlite to create a loose, well-draining mix. Roses thrive in slightly acidic to neutral soil (pH 6.0–6.5)—test your soil and adjust with lime or sulfur if needed.
How deep should I loosen the soil for roses?
Loosen soil to a depth of 12–18 inches to encourage deep root growth. Use a garden fork or tiller to break up compacted layers. For heavy clay soil, mix in 3–4 inches of organic matter (like compost or aged manure) to improve aeration and moisture retention.
What if my soil is too sandy or clay-heavy?
| Problem Soil | Solution |
|---|---|
| Sandy soil | Add 30% organic matter (compost, peat moss) and 10% clay to retain moisture and nutrients. |
| Clay soil | Mix in 50% sand or perlite and 20% compost to improve drainage and prevent root rot. |
For both, aim for a crumble-test texture: slightly gritty but moisture-retentive.
How often should I fertilize after preparing the soil?
After initial soil prep, apply a balanced rose fertilizer (10-10-10) at planting, then every 4–6 weeks during the growing season. Switch to a low-nitrogen, high-phosphorus fertilizer (like 5-10-10) in late summer to promote blooming. Always water deeply after fertilizing to prevent root burn.
Pro Tip:
Mulch your roses with 2–3 inches of organic mulch (like shredded bark) after planting to conserve moisture, regulate soil temperature, and suppress weeds. But keep mulch 2 inches away from the stem to avoid rot.
Wrapping up and next steps
Preparing the perfect soil for your rose garden is the foundation of stunning, healthy blooms! 🌹 By focusing on drainage, nutrient balance, and organic matter, you’ve set the stage for a thriving garden that will reward you with vibrant roses year after year.
Now that your soil is loose, aerated, and rich in essential nutrients, it’s time to plant with confidence—your hard work is about to pay off!
Ready to take the next step? Choose your rose varieties, dig those holes, and get planting! For extra care, consider adding a mulch layer to retain moisture and protect your roses as they grow. Happy gardening—your dream rose garden awaits! 🌱