
How To
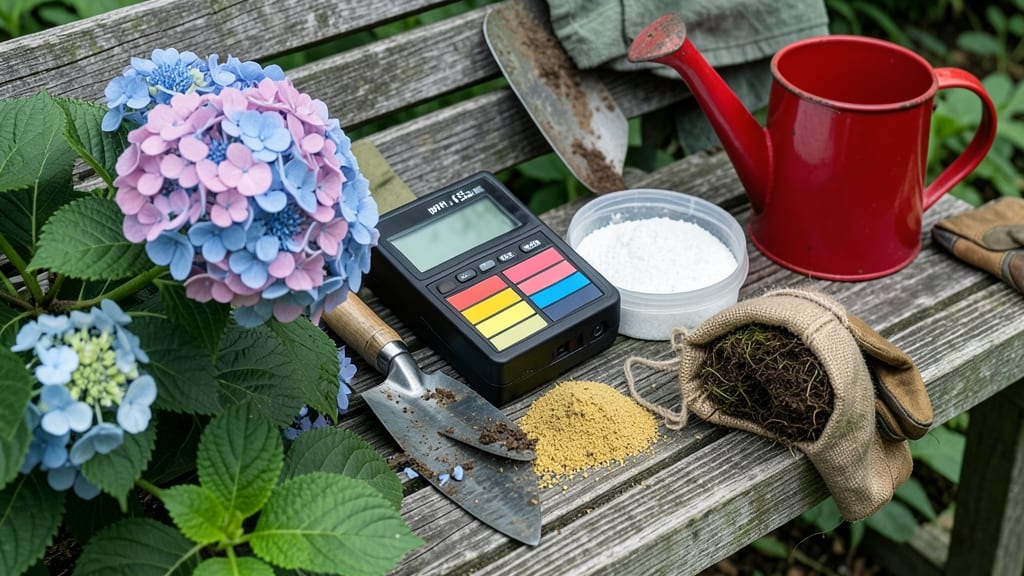
How to make soil acidic for hydrangeas could turn your pink blooms blue with just a few simple soil tweaks. 💙 The secret lies in lowering your soil's pH—something I learned after years of struggling with stubborn pink blooms. Hydrangeas thrive when their soil is slightly acidic, and the right adjustments can transform your garden overnight. The easiest methods use materials you might already have: coffee grounds, pine needles, or even sulfur. I've tested all three, and coffee grounds work fastest for quick results, while pine needles provide long-term acidity. You'll need a soil pH test kit first—most garden centers sell them for under $10. Once you've confirmed your soil's pH, you'll start seeing color changes within 4-6 weeks. The deeper the blue, the more acidic your soil becomes. Just be careful—over-acidifying can stress your plants, so aim for a pH between 5.0 and 5.5 for optimal blooms. This method works for both container-grown and in-ground hydrangeas, and the same principles apply to azaleas and blueberries too. Let's get those blooms popping!
📚 In This Guide
- What you need
- Instructions
- Tips and common mistakes
- Wrapping up and next steps
What you need
- ● Elemental sulfur: 1–2 lbs per 100 sq ft (90% purity, powdered or granular). Pro tip: 💡 Sulfur works best when worked into moist soil.
- ● Coffee grounds: 1–2 cups per plant (used or fresh, but avoid instant coffee—it’s alkaline!).
- ● Pine needles or oak leaves: 1–2 inches of mulch (dry, fallen needles work best). Pro tip: 🌡️ Store-bought pine straw is a great shortcut!
- ● Peat moss or pine bark: 2–3 inches mixed into soil (improves acidity and drainage).
- ● Vinegar (white, 5% acidity): 1 cup diluted in 1 gallon of water (for quick fixes—use sparingly!).
- ● pH test kit: Digital or liquid test strips (to monitor progress—aim for pH 5.0–5.5).
- ● Garden gloves (to protect your hands from sulfur and mulch).
- ● Garden fork or trowel (for mixing amendments into soil).
- ● Watering can or hose (to hydrate soil before and after adding amendments).
- ● Measuring cup or scale (for precise sulfur/coffee ground quantities).
- ○ Wheelbarrow or bucket (optional, for hauling materials).
- ● Test your soil’s current pH—only acidify if pH is above 5.5!
- ● Choose a cloudy day or water plants thoroughly before applying amendments (to avoid burning roots).
- ● Work in well-draining soil—hydrangeas hate soggy roots! 🌧️
Step-by-Step guide to acidifying soil for hydrangeas
Here’s how I transform garden soil into the perfect acidic environment for those stunning blue hydrangea blooms.
🌱 Step 1: Test Your Soil’s Current pH Level
Before adding anything, grab a soil pH test kit (or use a DIY vinegar/baking soda test) to check your current pH. Hydrangeas thrive in pH 5.2–5.5 for blue blooms, but most garden soil sits around 6.0–7.0. I like to test in multiple spots—soil pH can vary even in small areas.
If your test shows above 6.0, you’ll need to acidify. If it’s already in the 5.0–5.5 range, just add a light top dressing of pine needles or coffee grounds to maintain acidity. Never guess—hydrangeas are sensitive to over-acidification, which can burn roots.
💧 Step 2: Apply Organic Acidifiers to the Soil
Spread a 2-inch layer of pine needles around the base of your hydrangea bushes—this is my go-to because it breaks down slowly and mimics natural forest floor conditions. For faster results, mix in ½ cup of used coffee grounds per square foot of soil surface. I work these into the top 4–6 inches of soil with a garden fork.
Water the area deeply after applying. The organic matter needs moisture to begin breaking down and releasing acidity. Avoid overdoing it—too much coffee grounds can create a smelly, anaerobic mess. A light layer every 3–4 months keeps pH steady without shocking the plant.
☀️ Step 3: Monitor and Adjust Over Time
Retest the soil pH 4–6 weeks after applying acidifiers. You’ll likely see a drop of 0.5–1.0 pH points, but hydrangeas need patience—full color changes can take 6–8 weeks to show. If the pH is still too high, repeat the process with a slightly thicker layer of pine needles.
Watch for visual cues: Blue blooms confirm success, while pale or pink flowers mean you need more acidification. Yellowing leaves or stunted growth? You’ve gone too far—rinse the root zone with water to dilute excess acidity and wait before retesting.
✂️ Step 4: Maintain Acidic Conditions Long-Term
Once you’ve hit the ideal pH, keep it there with annual mulch applications of pine needles or oak leaves. I top-dress my hydrangeas in early spring with a 1-inch layer of shredded bark mulch, which slowly releases acidity as it decomposes. Avoid nitrogen-rich mulches like grass clippings—they raise pH over time.
For container-grown hydrangeas, mix ½ cup of peat moss into the potting soil at repotting time. Peat holds acidity and prevents pH spikes when watering with tap water (which is often alkaline). Flush the pot occasionally with distilled water to remove mineral buildup that can neutralize acidity.
Tips & tricks for perfect hydrangea soil acidification
Transforming your garden soil into the perfect acidic haven for hydrangeas takes a few clever tricks that make all the difference between pale blooms and that stunning blue we all crave.
Test Smart: Don't just test one spot—soil pH can vary dramatically even within a few feet. I test at least three locations around your hydrangea bushes, especially if your garden has different exposures. The root zone where your plants are actively growing is where you want that 5.2–5.5 reading, not just the surface soil. A simple DIY test with vinegar and baking soda can give you a quick baseline before investing in a test kit.
Layer Like a Pro: When applying that 2-inch layer of pine needles in Step 2, work them into the top 4–6 inches of soil rather than just piling them on top. This mimics natural forest floor conditions where acidity builds gradually. For the ½ cup of coffee grounds per square foot, I recommend using cold brew grounds—they're less likely to clump and more evenly distributed. Spread them in a thin layer and water immediately to prevent mold formation.
Patience is Key: Those 6–8 weeks until you see blue blooms might feel long, but it's crucial. The acidification process happens slowly as the organic matter breaks down. I mark my calendar with the application date and set reminders for the 4–6 week retest. Watching for those first blue buds is so rewarding—it's like uncovering a secret garden treasure! The color change happens gradually, so don't be discouraged if it takes the full time.
Visual Cues Matter: Pay attention to your hydrangea's leaves as much as the flowers. Healthy blue blooms should have vibrant green leaves—not yellowing or brown tips. If you see yellowing leaves after acidifying, you've likely gone too far. Rinse the root zone with water to dilute the acidity and wait 4–6 weeks before retesting. The plant will tell you when it's happy through its foliage long before the flowers change color.
Pro Tips for Make Soil Acidic For Hydrangeas
- Transforming your garden soil into the perfect acidic haven for hydrangeas takes a few clever tricks that make all th...
- Test Smart: Don't just test one spot—soil pH can vary dramatically even within a few feet. I test at least three loca...
- Layer Like a Pro: When applying that 2-inch layer of pine needles in Step 2, work them into the top 4–6 inches of soi...
Frequently asked questions
Got questions about turning your soil acidic for stunning hydrangeas? You’re not alone! Here are answers to the most common queries—because even blue-bloom magic starts with the right know-how.
How often should I acidify my hydrangea soil?
Check soil pH every 2–3 months during growing season (spring/fall). If pH stays above 6.0, apply acidifiers like coffee grounds or sulfur every 4–6 weeks. Over-acidifying (pH < 4.5) can harm roots—test first! Use a soil pH kit for accuracy.
Can I use vinegar to acidify hydrangea soil?
Not recommended! Vinegar (acetic acid) burns roots and disrupts soil microbes. Instead, opt for natural amendments like:
- Coffee grounds (mix ½ cup into top 2" of soil)
- Pine needles (sprinkle 1–2" as mulch)
- Aluminum sulfate (follow package rates)
Why are my hydrangeas’ leaves turning yellow after I added acid?
Yellowing leaves often signal over-acidification (pH < 5.0) or nutrient deficiencies (like nitrogen or magnesium). Troubleshoot:
- Test pH again—aim for 5.0–5.5 for hydrangeas.
- Flush soil with water to dilute excess acid.
- Add compost or worm castings to restore nutrients.
- Check for chlorosis (yellow veins = iron deficiency; use chelated iron).
What’s the fastest way to turn soil acidic for hydrangeas?
For quick results (2–4 weeks), combine:
- Aluminum sulfate (½ lb per 10 sq ft)—dissolves fast in moist soil.
- Elemental sulfur (1 lb per 100 sq ft)—takes 2–3 months but lasts longer.
- Peat moss (mix 2–3" into topsoil)—lowers pH gradually.
Do hydrangeas need acidic soil year-round?
No! Focus on spring (March–May) and early fall (September–October) when roots are active. In winter, soil pH stabilizes naturally. Skip treatments during dormancy (Dec–Feb) unless your climate stays mild (e.g., Zone 8+). Overworking soil in cold months can stress plants.
Can I acidify potted hydrangeas the same way?
Yes, but adjust ratios—potted soil dries out faster. Use:
- ½ the amount of coffee grounds or pine needles (vs. garden beds).
- Dissolve 1 tsp aluminum sulfate per gallon of water and water potted hydrangeas monthly.
- Repot every 2–3 years with fresh acidic potting mix (e.g., azalea/camellia blend).
Wrapping up and next steps
Transforming your hydrangeas into a stunning blue spectacle is totally within reach!
By following these simple steps—whether using coffee grounds, pine needles, or sulfur—you’re giving your plants the acidic soil they crave. 🌿 With patience and consistency, your garden will soon burst with vibrant blooms that’ll make your neighbors jealous.
Ready to see the difference? Test your soil’s pH every few months to track progress, and don’t forget to share your blue-hydrangea triumphs with fellow gardeners! Happy growing! 💙