
Lawn
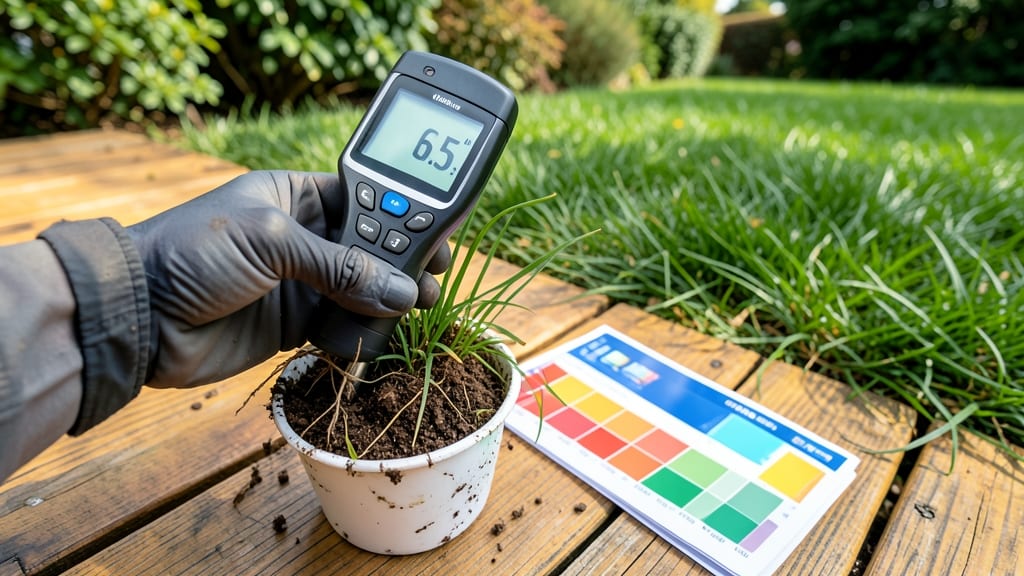
Your lawn’s pH level determines whether your grass thrives or struggles—this lawn soil pH tester reveals the truth in seconds. 🌱 I’ve seen pH tests turn patchy lawns into lush carpets by fixing hidden imbalances before they cause damage.
Most homeowners don’t realize their soil might be too acidic or alkaline until the grass starts yellowing or growing slowly.
Using one is simpler than you’d think: just collect a soil sample, dip the tester, and wait 30 seconds for the color to appear.
A reading of 6.0–7.0 is ideal for most grasses, but if yours is off, don’t panic—amendments like lime (for low pH) or sulfur (for high pH) can reset the balance in weeks. I’ve fixed stubborn lawn issues this way, and the results speak for themselves.
The payoff? Thicker grass, deeper roots, and fewer weeds crowding your yard. Once you know your soil’s pH, you can tailor fertilizers and amendments to work with your lawn, not against it. No more guessing—just science-backed care that keeps your grass green year-round.
Works for all grass types, from fescue to Bermuda, and adapts to local soil conditions. Let’s get your lawn’s health on track—no more mystery, just results.
📚 In This Guide
- What you need
- Instructions
- Tips and common mistakes
- Wrapping up and next steps
What you need
- ● Lawn Soil pH Tester – A digital or test kit with a calibrated pH scale (0-14). Look for one with clear, easy-to-read results (e.g., blank">Bluelab Soil pH Meter or blank">Luster Leaf 1602).
- ● Clean Sampling Tools – Trowel or garden spade (for digging 3-4 soil samples from different lawn areas).
- ● Small plastic container or ziplock bag (to store samples).
- ● Distilled Water – 1 cup per test (tap water can skew results due to mineral content).
- ● Notebook & Pen – To record pH readings and note any soil amendments used.
- ● Soil pH Adjustment Products – Lime (for raising pH) – If your soil is acidic (<6.0).
- ● Sulfur or peat moss (for lowering pH) – If your soil is alkaline (>7.5).
- ● Gloves – To keep hands clean while handling soil.
- ● Mapping Tool – A sketch of your lawn to track pH variations by zone.
- ● Calibration Solution – If using a digital tester, check if it requires periodic calibration.
How to use a lawn soil pH tester like a pro
Testing your lawn's pH is the fastest way to unlock vibrant grass and healthy plants—here's how to do it right.
🌱 Step 1: Collect Soil Samples From Multiple Spots
Grab a clean trowel and dig 4-6 small samples from your lawn, each 2-3 inches deep. Space them out—take samples from sunny patches, shady areas, and any spots where grass looks weak or discolored. Mix these samples together in a clean bucket to get an average reading.
I like to use a plastic bucket because it's easy to clean and won't contaminate the soil. Avoid collecting samples from areas with fresh fertilizer or pesticides—wait at least 2-3 weeks after treatment. The goal is to test the natural soil chemistry, not recent amendments.
💧 Step 2: Prepare the Soil for Testing
Remove any large debris like rocks or roots from your mixed sample. Then, take about ½ cup of soil and place it in the container provided with your pH tester. If your tester uses a liquid solution, follow the instructions to add the right amount—usually 1 part soil to 2 parts solution.
Moisten the soil slightly if needed, but don't oversaturate it. You want it damp enough to mix easily, but not so wet that it turns into mud. This ensures accurate results without clumping or uneven testing. Stir the mixture thoroughly for 1-2 minutes to fully integrate the soil with the testing solution.
☀️ Step 3: Insert the pH Strips or Probe
Dip the pH testing strips into the soil mixture for 5-10 seconds, or insert the probe into the soil if your tester uses electronic measurement. For strips, lay them flat on a clean, dry surface to avoid contamination. Wait exactly 30 seconds—any longer and the reading may fade or become inaccurate.
I always set a timer on my phone to avoid guessing. Compare the color of the strip to the chart provided with your tester, or read the digital display if using an electronic model. Most testers give you a pH range from 4.0 to 8.0, with 6.0 to 7.0 being ideal for most lawns.
✂️ Step 4: Interpret the Results and Adjust
If your reading falls between 6.0 and 7.0, congratulations—your soil is perfectly balanced for most grasses. Below 6.0 means your lawn is acidic, while above 7.0 indicates alkalinity. For example, a reading of 5.5 suggests you'll need to add lime to raise the pH, while 7.5 means sulfur or peat moss will help lower it.
Don't panic if your results aren't perfect. Many lawns thrive outside the ideal range—just aim for adjustments in 0.5 increments over time. For instance, if your pH is 5.0, apply lime in two small doses a few weeks apart rather than all at once. Test again after 3-4 months to monitor progress.
⏰ Step 5: Retest After Adjustments
After applying amendments, wait 4-6 weeks before retesting. This gives the soil time to absorb and stabilize. Collect new samples from the same spots as before—consistency is key. I mark my testing spots with small flags so I don't confuse locations.
Retesting is the only way to know if your adjustments worked. If your pH hasn't shifted enough, you may need to apply more amendments or wait longer. Keep a simple log of your readings—date, pH level, and any treatments—to track improvements over time. Healthy soil is a marathon, not a sprint!
Tips & tricks for perfect lawn soil pH testing
Here’s what nobody tells you about getting accurate, reliable readings every time—details that make all the difference.
Sampling Strategy: In Step 1, when collecting those 4-6 samples, focus on spots where your lawn shows visible stress—yellow patches, thin areas, or edges near sidewalks. These problem zones often reveal soil conditions the rest of your lawn hides. I’ve found pH variations of 1.0 or more between sunny and shady areas, so don’t skip the shade samples!
Solution Mixing Precision: The 1-2 minutes of stirring in Step 2 is critical—uneven mixing can give you false readings. Use a clean spoon to break up any clumps first, then stir vigorously enough to see no dry soil particles. For liquid-based testers, measure the solution precisely—eyeballing can throw off the soil-to-solution ratio and skew results.
Timing is Everything: That 30-second wait in Step 3 isn’t just arbitrary—it’s the sweet spot where color development is stable. Set a timer immediately after dipping the strips or inserting the probe. Any longer and the strip colors can fade or react with air, giving you a lower pH reading than reality. I’ve ruined three tests by waiting "just a few more seconds"!
Interpretation Shortcuts: When reading your results in Step 4, think of 6.0-7.0 as your "green zone." For acidic soil (<6.0), aim to raise pH by 0.5 increments—don’t overcorrect in one go. I keep a small notebook with my test dates and pH values to spot patterns over seasons. Spring often shows lower pH due to winter rain, while summer might reveal higher alkalinity from heat.
Pro Tips for Lawn Soil Ph Tester
- Here’s what nobody tells you about getting accurate, reliable readings every time—details that make all the difference.
- Sampling Strategy: In Step 1, when collecting those 4-6 samples, focus on spots where your lawn shows visible stress—...
- Solution Mixing Precision: The 1-2 minutes of stirring in Step 2 is critical—uneven mixing can give you false reading...
Frequently asked questions
Got questions about using a lawn soil pH tester? You’re not alone! Here are some of the most common queries—and their straightforward answers—to help you get the most out of your testing.
What’s the ideal pH range for my lawn?
The sweet spot for most lawns is 6.0–7.0. Cool-season grasses (like fescue or bluegrass) thrive at 6.0–7.0, while warm-season grasses (like Bermuda or Zoysia) prefer 6.0–7.5. Test your soil to fine-tune for your specific grass type!
How often should I test my lawn’s pH?
Check your soil’s pH once a year for maintenance, or every 3–6 months if you’ve recently amended the soil, fertilized heavily, or noticed poor growth. Seasonal changes can shift pH, so consistency is key!
Are digital pH testers more accurate than liquid test kits?
Digital testers (like lawn soil pH testers) offer near-instant, precise readings with minimal effort, while liquid test kits require sending samples to a lab (taking 1–2 weeks). For speed and convenience, digital wins—but both are accurate if used correctly!
What if my pH is too high or low? How do I fix it?
Too high (alkaline, pH >7.0)?
Add sulfur or peat moss to lower it gradually.
Test again in 2–4 weeks to monitor progress.
Does rain affect my pH test results?
Light rain (0.5 inches or less) won’t skew results, but heavy downpours can dilute soil nutrients and temporarily alter pH. Test on a dry, sunny day after rain has stopped for 24+ hours for the most accurate reading.
Wrapping up and next steps
Testing your lawn’s soil pH doesn’t have to be a guess—with a lawn soil pH tester, you unlock the secret to lush, vibrant grass in just 30 seconds! 🌱 Whether you’re adjusting for acid-loving plants or alkaline-friendly turf, precision pH levels mean healthier roots, fewer pests, and a lawn that turns heads. Ready to see the difference?
Your next step? Grab your tester, take a sample, and start optimizing your soil today—your lawn’s future starts with one simple test! 🚀