
How To
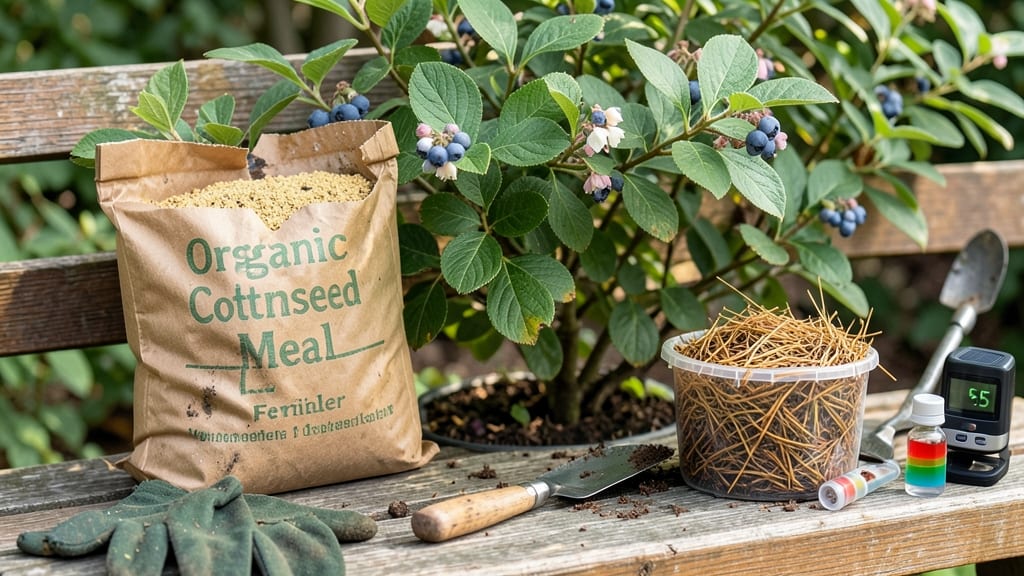
Creating acidic soil for blueberries is the science-backed secret behind the deep purple berries I've grown for years. 🌿 The first time I planted blueberries in regular garden soil, the bushes looked healthy but produced tiny, bitter fruit. That changed when I learned how to create the right acidic environment.
You'll need sulfur, peat moss, or pine needles (depending on your soil type) plus a soil pH test kit to monitor progress. The process takes 4-6 weeks to show results, but the payoff is worth it—bushes that produce 10x more fruit and stay disease-resistant.
Safety tip: handle sulfur with gloves and avoid inhaling dust.
Start by testing your soil's current pH, then amend it with 2-4 pounds of elemental sulfur per 100 square feet for quick acidification. Mix in 2-3 inches of peat moss or pine needles for organic acidity that lasts. Water well after amending to help the sulfur dissolve.
Check the pH again after 4 weeks—if it's still too high, add more sulfur in small amounts. Over-acidifying can harm roots, so aim for gradual changes.
Once established, maintain acidity with annual sulfur applications in early spring. Your bushes will reward you with vibrant foliage and heavy harvests for years.
📚 In This Guide
- What you need
- Instructions
- Tips and common mistakes
- Wrapping up and next steps
What you need
- ● Peat moss or coconut coir: 5–10 gallons (or 50–75% of your soil mix by volume). Pro tip: Coconut coir is a sustainable alternative!
- ● Sulfur (elemental or powdered): 1–2 lbs per 100 sq ft. ⚠️ Safety first: Wear gloves and avoid inhaling dust.
- ● Pine bark fines or pine needles: 2–3 gallons (adds organic acidity and improves drainage).
- ○ Composted pine sawdust: 1–2 gallons (optional but boosts acidity over time).
- ● Lime-free compost: 2–3 gallons (avoid regular compost—it’s alkaline!).
- ● Well-draining soil (sandy loam preferred): 50–75% of the mix (test pH first—aim for 4.5–5.5).
- ● pH testing kit: Digital or liquid test kit (e.g., LaMotte or MySoil). 💡 Test before and after amending!
- ● Garden fork or tiller: For mixing amendments into the soil (12–18" deep).
- ● Gloves, watering can, and hose: For safety and hydration.
- ● Aluminum sulfate: 1–2 lbs per 100 sq ft (faster acidification, but use sparingly).
- ● Wood ash (from untreated wood): Only if your soil is too acidic! (Never use with blueberries.)
- ● Organic mulch (pine straw or leaves): 2–3 inches to maintain acidity long-term.
- ● Blueberry-specific fertilizer: Acid-loving blend (e.g., Miracid or Espoma).
Step-by-Step guide to creating acidic soil for blueberries
Here's how to transform your garden into a blueberry paradise with soil chemistry that's perfect for these finicky bushes.
🌱 Step 1: Test and Understand Your Current Soil
Blueberries demand soil with a pH between 4.5 and 5.5—any higher and they'll refuse to thrive. Grab a soil test kit to measure your current pH. I like the Luster Leaf Rapitest because it gives results in minutes. Dig samples from 6 inches deep where roots will grow, as surface soil often differs dramatically from subsoil.
If your test shows pH above 6.0, you're starting from scratch. Below that? You'll still need to adjust, but the process will go faster. Pay attention to the soil's texture too—blueberries hate soggy feet, so aim for well-draining loam. If your soil feels like concrete when dry or turns to mud when wet, you'll need to rebuild the structure completely.
🪴 Step 2: Remove Existing Soil and Prepare the Base
Dig out the planting area to a depth of 12-18 inches, removing all existing soil. This isn't optional—blueberries won't tolerate neutral or alkaline soil, and you can't just "mix" acidifiers into regular dirt. Line the bottom with 2-3 inches of coarse sand or perlite to ensure proper drainage. I use sharp river sand because it won't compact over time like construction sand.
For container growing, use 100% peat-based or pine bark mix—never garden soil. Fill the pot halfway with this acidic base before adding amendments. The key here is starting with a clean slate where you control every variable. If your yard soil has high clay content, add 1 part coarse sand to 1 part peat moss at the bottom to prevent compaction.
✂️ Step 3: Build the Acidic Loam Layer by Layer
Begin with 40% peat moss, the backbone of acidic soil. Peat holds moisture while staying loose—critical for blueberries. Mix in 30% coarse pine bark fines (not chunks) for structure and aeration. These two components alone will drop your pH to around 5.0, but you'll need to fine-tune it.
Add 20% composted pine needles or leaves for additional acidity and organic matter. Avoid oak leaves—they release tannins that can be too harsh. Finally, incorporate 10% sulfur-coated urea (follow package rates) to lower pH further if needed. Work this blend into the prepared base until you have a uniform, crumbly texture—it should feel like a damp sponge, not wet cement.
💧 Step 4: Adjust pH Precisely and Maintain Long-Term Acidicity
Test your mix again after blending. If the pH is still above 5.5, sprinkle elemental sulfur (½ cup per 10 square feet) and water thoroughly. The sulfur will take 4-6 weeks to fully acidify the soil. For faster results, use iron sulfate (½ pound per 100 square feet), which works in 7-10 days but may temporarily darken the soil.
To maintain acidity, top-dress annually with 2 inches of fresh pine bark mulch and ¼ inch of aluminum sulfate (follow label rates). Water deeply after each application—blueberries absorb nutrients through their leaves as much as their roots. I schedule this in early spring and fall to prevent pH spikes from rain or decomposition.
☀️ Step 5: Plant and Monitor for Optimal Growth Conditions
Plant your blueberries in the amended soil, placing the root crown 1 inch above the soil line. This prevents rot while allowing roots to expand downward. Water immediately with rainwater or distilled water—tap water often contains lime that raises pH. Use a soil pH meter every 2-3 months to catch drifts before they become problems.
Watch for yellowing leaves with green veins—this classic sign means your soil is too alkaline. If you see purple stems or small, stunted leaves, the pH is too low. Adjust with lime (to raise pH) or more sulfur (to lower it), but always make changes gradually. Blueberries are fussy, but once you nail the acidity, they'll reward you with years of bountiful harvests.
Tips & tricks for perfect blueberry soil chemistry
Between us, creating the ideal acidic environment for blueberries isn't just about throwing ingredients together—it's about precision. Here's what nobody tells you about getting it right the first time.
Test Depth Matters: When testing your soil's pH in Step 1, dig samples from exactly 6 inches deep where roots will grow. Surface soil often shows different pH levels than subsoil, and blueberry roots need consistent acidity throughout their growing zone. I've seen gardeners test at the surface and get confused results—always go deep enough to match where your bushes will actually grow. The difference between a thriving plant and a struggling one often comes down to this single, seemingly insignificant detail.
Drainage is Non-Negotiable: In Step 2, that 2-3 inch layer of coarse sand or perlite at the bottom isn't just for show—it's your insurance policy against root rot. Blueberries hate soggy feet, and even if your mix looks perfect, poor drainage will undo all your hard work. For container growing, make sure your pots have drainage holes AND use a mix that's at least 50% peat-based. I've had to replant blueberries twice because of inadequate drainage—don't make my mistake by skimping on this critical layer.
Peat Quality is Everything: The 40% peat moss in Step 3 should be high-quality, sphagnum peat—not the cheap, compressed kind you find in bags at garden centers. Low-quality peat can compact over time, reducing aeration and moisture retention. Look for "sphagnum peat moss" labeled for acid-loving plants. I source mine from specialty nurseries because the difference in texture and performance is night and day. This is where you either set yourself up for success or create long-term problems.
Timing Your pH Adjustments: When using elemental sulfur in Step 4, remember it takes 4-6 weeks to fully acidify the soil. Don't rush this process—applying more won't make it work faster, and you risk creating a toxic environment. For containers, you can use iron sulfate for quicker results (7-10 days), but monitor the pH closely. I test my soil every 2 weeks during this adjustment period to catch any unexpected shifts. Patience here prevents headaches later when your bushes start showing stress symptoms.
Pro Tips for Creating Acidic Soil For Blueberries
- Between us, creating the ideal acidic environment for blueberries isn't just about throwing ingredients together—it's...
- Test Depth Matters: When testing your soil's pH in Step 1, dig samples from exactly 6 inches deep where roots will gr...
- Drainage is Non-Negotiable: In Step 2, that 2-3 inch layer of coarse sand or perlite at the bottom isn't just for sho...
Frequently asked questions
Got questions about creating the perfect acidic soil for your blueberries? You’re not alone! Here are some of the most common concerns—and straightforward answers—to help you grow thriving bushes with confidence.
How long does it take for soil amendments to lower pH?
Most soil amendments like sulfur or peat moss take 3–6 months to adjust pH significantly. Test your soil every 2–3 months until you hit the ideal range of 4.5–5.5. Patience pays off—rushing can lead to over-acidification, which harms plant roots.
Can I plant blueberries in acidic soil right away without waiting?
While you can plant blueberries in amended soil immediately, give amendments at least 1–2 months to integrate before planting for best results. If you’re in a hurry, opt for container gardening with pre-acidified potting mix—it’s a faster, foolproof solution!
What’s the fastest way to acidify soil if my blueberries are struggling?
For a quick fix, mix elemental sulfur (½–1 lb per 100 sq ft) into the top 6 inches of soil and water thoroughly. Alternatively, apply vinegar or coffee grounds (1 cup per plant) as a temporary boost—though these are less long-term solutions. Always retest pH after 4–6 weeks.
Are there natural alternatives to chemical amendments?
Yes! Try these organic options:
- Pine needles or oak leaves: Sprinkle a 2–3 inch layer around bushes and till into soil.
- Cottonseed meal: Adds nitrogen while slowly acidifying (use 1–2 lbs per 100 sq ft).
- Wood ash (sparingly!): Actually raises pH, so avoid it—it’s the opposite of what you need.
My soil is too acidic (pH below 4.5)—how do I fix it?
If your soil is overly acidic, amend it with lime (calcium carbonate) or wood ash (use sparingly!). Aim to raise pH by 0.5 units per application and retest monthly. Avoid sudden jumps—gradual changes prevent root shock. For containers, flush with water and replace 20% of the mix with fresh, slightly alkaline soil.
How often should I test soil pH for blueberries?
Test your soil every 6–12 months or whenever you notice yellow leaves, stunted growth, or poor berry production. Spring and fall are ideal times. Invest in a digital pH meter ($20–$50) for accuracy—kits with color charts can be misleading. Keep a log to track progress!
Wrapping up and next steps
Creating acidic soil for your blueberries doesn’t have to be a guess—just a little science and patience!
With the right mix of sulfur, peat moss, and pine needles, you’ll give your bushes the perfect low-pH home they crave. 🌱 Remember, consistency is key: test your soil regularly and adjust as needed.
Ready to take the next step? Plant those blueberry bushes and watch them thrive! For extra tips, check out our guide on maintaining soil acidity long-term—your future harvests will thank you!