
How To
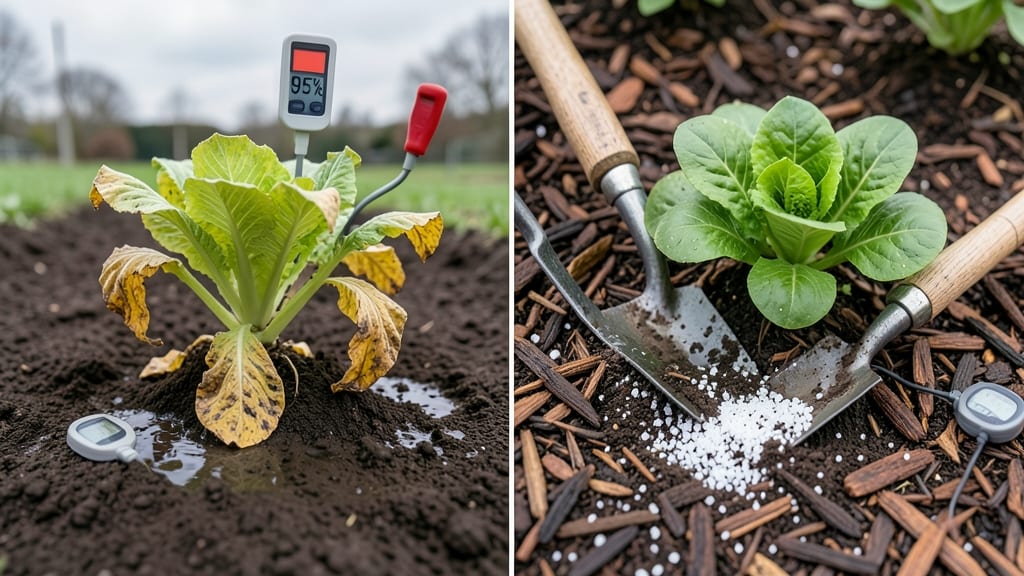
Your soggy garden beds are telling you something—it’s time to increase soil drainage before roots suffocate. 🌱 After years of wrestling with waterlogged soil that turned my vegetable patch into a swamp, I discovered the layered gravel-and-sand method that finally gave my plants room to breathe.
The fix isn’t complicated, but it requires patience and the right materials to create drainage layers that last.
Start by testing your soil: dig a hole, fill it with water, and time how long it takes to drain. If it’s still wet after 6 hours, you’ve got a problem.
The solution involves adding 2-3 inches of coarse gravel at the bottom of planting areas, topped with a 1-inch layer of sharp sand before mixing in compost. This creates channels for water to escape while keeping nutrients where roots need them.
Within weeks, you’ll notice healthier plants with deeper root systems and fewer signs of rot. The gravel stays in place while the sand blends into the soil, so maintenance is minimal—just top up the layers every few years.
My tomatoes now thrive where they once wilted, and the same method works for flower beds and raised beds too.
Fair warning: this method won’t work for clay-heavy soils without additional amendments, and heavy rain can still test your setup. But for most compacted gardens, it’s the foolproof fix that saves your plants—and your sanity—year after year. Let’s get your soil breathing again.
📚 In This Guide
- What you need
- Instructions
- Tips and common mistakes
- Wrapping up and next steps
What you need
- ● Gravel: 1–2 yards of crushed stone (¾" to 1½") – for the base layer (check local costs; bulk purchases save money!).
- ○ ½ yard of pebbles (½" to ¾") – for the top layer (optional but improves aesthetics).
- ● Sand: 1–1.5 yards of coarse builder’s sand (avoid fine sand—it compacts!).
- ● Geotextile Fabric: 1 roll (10’ x 50’) of landscape fabric (to separate layers and prevent mixing).
- ● Tools: Shovel (flat-edged for digging, pointed for precision).
- ● Wheelbarrow (for hauling materials).
- ● Rake (bow rake for leveling gravel/sand).
- ● Level (2–4 ft) or string line + stakes (to ensure even layers).
- ● Tamper or plate compactor (rent if needed; 50–100 lbs is ideal).
- ● Measuring tape (10–25 ft).
- ● Garden hose (for wetting soil before digging).
- ● Drainage Pipe: 4" corrugated drain tile (if your garden has severe waterlogging; cut to length).
- ● Organic Mulch: Wood chips or straw (top layer to retain moisture and suppress weeds).
- ● Soil Amendment: Compost or peat moss (mix 2–3 inches into the topsoil post-project).
- ● Knee Pads/Work Gloves: Because comfort (and blisters) matter! 😉
Step-by-Step instructions for improving soil drainage in compacted gardens
Here's the foolproof method I use to transform heavy, waterlogged soil into loose, well-draining earth.
🪴 Step 1: Test Your Current Drainage
Dig a 6-inch deep hole in your problem area. Fill it with water and time how long it takes to drain completely. If it takes longer than 4 hours, your soil is too compacted. I like to test multiple spots—sometimes drainage varies even in small yards.
Press your finger into the soil at the bottom of the hole. If it feels hard like a brick or leaves a deep imprint that doesn't spring back, that's your confirmation you need to improve drainage. This simple test saves you from guessing—you'll know exactly where to focus your efforts.
💧 Step 2: Clear the Work Area
Remove any grass, weeds, or debris from a 12-inch wide strip along where you'll be working. Use a garden fork or trowel to loosen the top 4-6 inches of soil. This breaks up the compacted layer so your amendments can penetrate effectively. I find it helps to work in 2-foot sections at a time—it keeps the project manageable.
Don't worry about making it perfect—just aim for a loose, crumbly texture. If you hit a particularly stubborn layer, take your time to break it up. The goal is to create space for water to move through, not to create a perfect tilth. You'll see the difference immediately when the soil starts to crumble in your hands.
✂️ Step 3: Layer Coarse Materials
Spread a 2-inch layer of coarse sand (like builder's sand) over the loosened area. This creates the first drainage layer that allows water to percolate downward. Next, add a 1-inch layer of small gravel (about ¼-inch diameter) on top of the sand. The gravel prevents the sand from mixing into the soil below.
Use a rake to level both layers evenly. Here's the thing—don't compact these layers. You want them to stay loose so they can do their job. If you accidentally compact them, just go back and loosen them again. This layered approach mimics natural soil profiles where different textures work together to improve drainage.
🌱 Step 4: Blend With Native Soil
Remove about half of the topsoil from your work area and mix it with the remaining 2-inch layer of coarse sand (about 50/50 ratio). This creates a well-draining top layer while maintaining some of the soil's natural fertility. Spread this mixture back over your gravel layer, creating a 3-inch thick topsoil layer.
Work the mixture gently with your hands or a broadfork to avoid compacting it. You'll notice the texture is lighter and crumbles more easily than your original soil. This blended layer gives plants roots room to grow while still allowing excess water to drain away. Don't skip this blending step—it's what makes the difference between good and great drainage.
☀️ Step 5: Test and Maintain
After completing your amended area, water it thoroughly and observe how quickly the water drains. Ideally, it should disappear within 30-60 minutes. If it drains too quickly (within minutes), add a ½-inch layer of compost to help retain some moisture for plants. If it still drains slowly after 24 hours, you may need to add more gravel.
To maintain this improved drainage, avoid walking on the amended areas when they're wet. Consider installing raised beds or pathways to protect your work. I like to add a 1-inch layer of compost** annually to maintain fertility while preserving the drainage structure you've created. With proper maintenance, your improved drainage will last for years.
Tips & tricks for perfect soil drainage solutions
Here's what I've learned from years of fixing soggy gardens—these tricks will help you avoid common pitfalls and get the best results.
Drainage Test Accuracy: For the most reliable test in Step 1, use a clear glass or plastic container to fill your 6-inch hole. This lets you see exactly how fast water disappears. I've found that adding a few drops of food coloring helps track water movement through the soil layers—you'll spot where water gets stuck. If colored water pools at the 4-inch mark after 4 hours, that's where your compaction is worst.
Layering Strategy: When creating your drainage layers in Step 3, think of it like building a lasagna—each layer has a specific job. Start with the 2-inch coarse sand layer as your base, then add the 1-inch gravel. The gravel's larger particles create air pockets that water can flow through, while the sand below prevents mixing. Pro tip: Use a straightedge tool to create perfectly level layers—uneven surfaces can create drainage hotspots where water pools.
Soil Blending Technique: In Step 4, when mixing your topsoil with the remaining 2-inch coarse sand, I recommend using a broadfork instead of a shovel. The broadfork's tines break up clumps without compacting the mixture. Work the blend gently—you're not trying to create a perfect tilth, just a loose, crumbly texture that allows both water movement and root growth. Think "airy" rather than "fluffy."
Maintenance Secret: The annual 1-inch compost top dressing in Step 5 is your secret weapon for long-term success. But here's the thing: don't just dump compost on top—work it into the top 1-2 inches of your amended soil. This keeps your drainage structure intact while adding organic matter that breaks down over time, maintaining that perfect balance between drainage and moisture retention.
Pro Tips for Increase Soil Drainage
- Here's what I've learned from years of fixing soggy gardens—these tricks will help you avoid common pitfalls and get ...
- Drainage Test Accuracy: For the most reliable test in Step 1, use a clear glass or plastic container to fill your 6-i...
- Layering Strategy: When creating your drainage layers in Step 3, think of it like building a lasagna—each layer has a...
Frequently asked questions
about improving soil drainage with gravel and sand—your quick fixes for compacted gardens!How long does it take for gravel and sand to improve drainage?
With proper layering, you’ll see noticeable drainage improvement within 1–2 weeks after installation. However, full benefits (like root penetration and erosion control) may take 3–6 months as soil stabilizes. Monitor rainfall response to gauge progress!
What if my yard floods even after adding gravel?
Flooding could mean:
- Insufficient depth: Aim for at least 6–12 inches of gravel/sand layers.
- Clay-heavy soil: Mix in coarse sand or perlite to break up compaction.
- Poor grading: Ensure your yard slopes away from foundations (1–2% grade).
Is gravel/sand cheaper than other drainage solutions?
Yes! A DIY gravel/sand layer costs $0.50–$3 per sq. ft. compared to:
- Drainage pipes: $5–$15/sq. ft. installed.
- Retaining walls: $15–$50/sq. ft.
- Soil amendments (like gypsum): $0.20–$1/sq. ft. but less effective long-term.
Will this method harm my plants or lawn?
Not if done right! Topsoil should remain undisturbed—only amend below the root zone. For lawns:
- Use fine gravel (pea-sized) near grass edges to avoid scalping.
- Avoid compacting the sand/gravel layer—walk on it lightly post-install.
- Water deeply after installation to help roots adjust.
Can I reuse existing gravel from my driveway?
Yes, but screen it first to remove:
- Dust/debris (use a 1/4-inch mesh).
- Fine particles (clogs drainage).
- Organic matter (rots over time).
Wrapping up and next steps
Improving soil drainage with a layered gravel and sand solution is a game-changer for compacted gardens—it’s simple, cost-effective, and yields long-term benefits for your plants. 🌱 Whether you’re tackling soggy patches or preparing for new plantings, this method ensures roots thrive by balancing moisture and airflow. Now’s your chance to transform that struggling soil into fertile ground!
🚀 Ready to Take Action?
Start small—pick one area of your garden and test the layers. Monitor progress over a few weeks, and soon, you’ll see healthier plants and easier maintenance. Your garden’s future starts with just one shovel’s worth of effort!