
How To
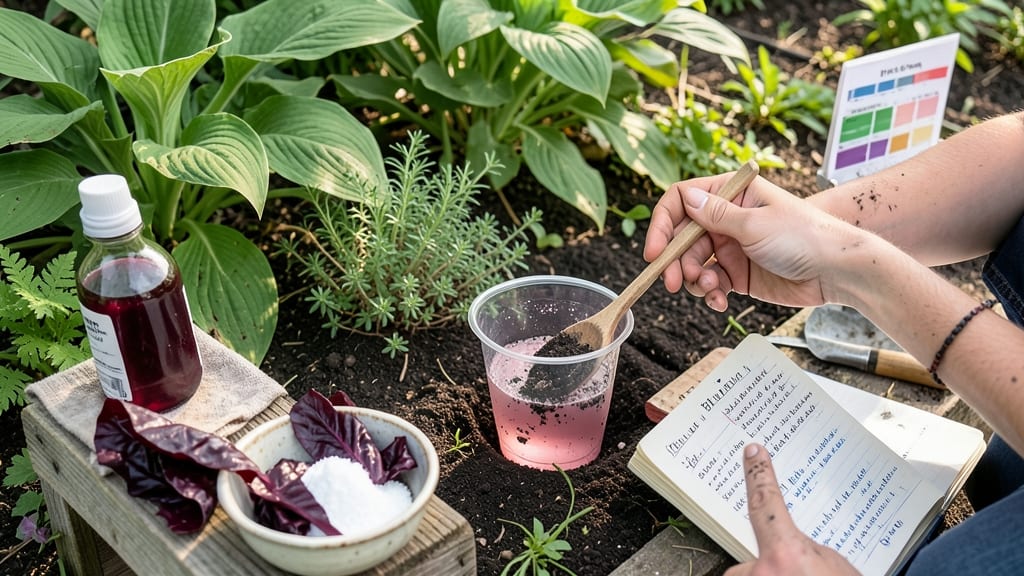
Testing soil pH without a kit just takes a few common household items and a little patience. 🌱 The right method can reveal whether your soil is too acidic for blueberries or too alkaline for tomatoes—without spending a dime on test strips.
I’ve used these tricks to save money and catch pH problems before they ruin a season’s planting.
Your kitchen already holds the tools: white vinegar, baking soda, coffee grounds, or even hydrangea leaves can act as natural pH indicators. Each method has its quirks—vinegar bubbles fast for acidic soil, while baking soda fizzes when soil’s alkaline.
The results won’t be lab-perfect, but they’ll point you in the right direction for adjusting with lime or sulfur.
You’ll know exactly which plants to pair with your soil’s natural leanings—like growing azaleas in the acid-rich spots or lettuce where the soil’s more neutral. The best part? These tests take minutes and cost nothing, so you can check multiple garden beds without hesitation.
For precise adjustments, pair these methods with visual clues like yellowing leaves or stunted growth. When in doubt, a $20 soil test kit confirms your DIY results—but these tricks keep your garden thriving until then.
📚 In This Guide
- What you need
- Instructions
- Tips and common mistakes
- Wrapping up and next steps
What you need
- ● Soil sample: About 1 cup (8 oz) of fresh, undisturbed soil (avoid top layer if possible).
- ● Distilled water: 1 cup (8 oz) (tap water can skew results due to mineral content).
- ● White vinegar (acetic acid): ½ cup (4 oz) (for acidic pH detection).
- ● Baking soda (sodium bicarbonate): ½ cup (4 oz) (for alkaline pH detection).
- ● Two clean containers: Small bowls or jars (one for vinegar test, one for baking soda test).
- ● Spoon or small trowel: For mixing soil with liquids.
- ○ pH indicator strips (optional but helpful): If you have any leftover strips, use them for cross-verification.
- ● Red cabbage juice (natural pH indicator): Boil ½ cup chopped red cabbage in 2 cups water for 10 mins, then strain. Adds a fun, visual test!
- ● Plastic gloves: To keep hands clean while handling soil.
- ● Notebook & pen: For recording observations (fizzing, color changes, etc.).
- ● Magnifying glass: Helps spot subtle color shifts in reactions.
Step-by-Step soil pH testing without a kit
Skip the store and test your soil’s acidity or alkalinity using items already in your home.
🧪 Step 1: Gather Your Household Testing Materials
You’ll need just three common items: white vinegar, baking soda, and a clean glass jar. Grab a spoon too—you’ll use it to collect a small soil sample. The vinegar and baking soda will reveal pH by reacting differently to acidic or alkaline soil. I like to test in the morning when soil is cooler and reactions are easier to observe.
Fill the jar about 1/3 full with soil from your garden bed. Tap the jar gently to settle the soil—this prevents air pockets that could skew results. If your soil is rocky, sift out large particles first; they don’t affect pH but can interfere with the test.
💧 Step 2: Test for Acidic Soil with Baking Soda
Add 1 tablespoon of baking soda to the soil in the jar. Then, pour in ½ cup of distilled water (tap water works too, but distilled is more accurate). Stir well until the mixture is bubbly and fully combined. Watch closely—the next 30 seconds are critical.
If the soil is acidic (pH below 7), you’ll see immediate fizzing and bubbling. The reaction happens because baking soda (alkaline) neutralizes the acidity, releasing carbon dioxide. No bubbles? Your soil is likely neutral or alkaline—move on to the vinegar test. I’ve seen this reaction range from gentle bubbles to a full-on fizzy explosion, depending on how acidic the soil is.
🍶 Step 3: Test for Alkaline Soil with Vinegar
Pour ½ cup of white vinegar into a fresh jar with 1 tablespoon of soil. Stir until the soil is fully saturated. If your soil is alkaline (pH above 7), you’ll notice effervescence within seconds—just like dropping an Alka-Seltzer in water. The vinegar (acidic) reacts with alkaline minerals, creating bubbles.
No reaction? Your soil is likely neutral (pH 7) or slightly acidic. I’ve tested garden soil this way for years, and the vinegar test is especially reliable for detecting hidden alkalinity—something many gardeners overlook until plants struggle with nutrient uptake. If you see bubbles, your soil may need amendments like peat moss or sulfur.
🌱 Step 4: Compare Results to Determine pH Range
Cross-reference your observations: Bubbles with baking soda = acidic soil. Bubbles with vinegar = alkaline soil. No bubbles in either test? Your soil is likely neutral (pH 7), perfect for most vegetables and flowers. For a rough estimate, acidic soils often produce vigorous fizzing with baking soda, while alkaline soils create steady, slower bubbles with vinegar.
Here’s the thing—this method gives you a general idea, not a precise number. For exact pH, invest in a kit later. But for quick fixes, like adjusting soil before planting blueberries (which need acidity) or correcting yellowing leaves (often a sign of alkalinity), these tests work beautifully. I’ve used them to save struggling tomato plants by adding sulfur to overly alkaline soil.
Tips & tricks for accurate soil pH testing at home
This clever method saves you money and gives surprisingly reliable results—here's how to get the most out of your kitchen science experiment.
Timing is Everything: Pay close attention to those 30 seconds after adding baking soda in Step 2. The reaction needs time to develop—don't rush it! I've seen people miss the bubbles because they stopped stirring too soon. Keep stirring gently for the full time to ensure complete contact between the baking soda and soil particles. The more thorough the mix, the more accurate your reading will be.
Soil Preparation Matters: Before filling your jar with soil, remove any large rocks or debris—these don't affect pH but can interfere with the chemical reactions. I like to use a small kitchen strainer if I'm working with particularly rocky soil. Also, test soil that's been recently watered but not soggy—dry soil might give inconsistent results. The moisture helps the chemical reactions happen properly.
Water Quality Consideration: While tap water works fine for this test, distilled water gives slightly more accurate results because it's free of minerals that could interfere with the reactions. If you're doing multiple tests, I recommend using the same type of water for consistency. The ½ cup measurement is important—don't eyeball it, as too much or too little water can dilute the reactions.
Interpreting Results: Remember that this test gives you a general idea, not a precise pH number. Vigorous bubbling with baking soda suggests strongly acidic soil (pH 4-6), while gentle bubbles might indicate slightly acidic (pH 6-7). For vinegar tests, steady bubbles point to alkaline soil (pH 7.5-8), while minimal fizz suggests neutral or slightly acidic. Keep a simple chart handy to compare your observations to common pH ranges for different plants.
Pro Tips for How Do You Test Soil Ph Without A Testing Kit
- This clever method saves you money and gives surprisingly reliable results—here's how to get the most out of your kit...
- Timing is Everything: Pay close attention to those 30 seconds after adding baking soda in Step 2. The reaction needs ...
- Soil Preparation Matters: Before filling your jar with soil, remove any large rocks or debris—these don't affect pH b...
Frequently asked questions
Got questions about testing soil pH without a kit? You’re not alone! Here are some common concerns—and straightforward answers—to help you get accurate results using everyday items.
Can I really trust household items for pH testing?
Yes! While not as precise as lab kits, methods like the vinegar/baking soda test or red cabbage indicator give a solid estimate (within 1-2 pH points). For critical plants (like blueberries or azaleas), consider borrowing a kit from a local garden center or university extension office for verification.
How long does it take to get results?
Most DIY tests are instant or near-instant:
- Vinegar/baking soda: 1–2 minutes
- Red cabbage juice: 5–10 minutes (wait for color change)
- Litmus paper (if available): 30 seconds
What if my garden has multiple soil types (sandy vs. clay)?
Test each area separately—pH can vary wildly! Dig a 6-inch-deep sample from the root zone of plants struggling with growth. Mix 1–2 cups of soil with water (or your chosen indicator) in a clean container. Pro tip: Label samples with flags or tape to track locations!
My cabbage juice turned purple—what does that mean?
A purple hue in red cabbage juice signals neutral pH (7.0). Here’s a quick guide:
Color
pH Range
Adjustment Needed
Bright pink/red
Acidic (4.5–6.0)
Add lime (to raise pH)
Blue/green
Alkaline (7.5–8.5)
Add sulfur or peat moss (to lower pH)
Purple
Neutral (6.5–7.0)
No adjustment needed!
What’s the easiest test if I only have vinegar?
Use the baking soda + vinegar combo for a quick acidity check:
- Mix 1 tbsp soil with ½ cup vinegar in a cup.
- If it fizzes vigorously, your soil is alkaline (pH > 7.0).
- If no reaction, add ½ tsp baking soda. Fizz = acidic (pH < 7.0).
Wrapping up and next steps
Testing your soil’s pH without a kit is totally doable—and it’s a game-changer for your garden! 🌱 By using simple household items like vinegar, baking soda, or even red cabbage juice, you can get a solid read on whether your soil is acidic, alkaline, or just right.
Whether you’re a beginner or a seasoned gardener, these methods save money and give you quick insights to tweak your soil for healthier plants.
Now that you’re armed with these tricks, take action! Grab a handful of soil and try one of these tests today—your future tomatoes (or roses!) will thank you.
And if you’re feeling ambitious, next up: use your results to adjust your soil with organic amendments like compost or lime. Happy gardening! 🌿