
Tools
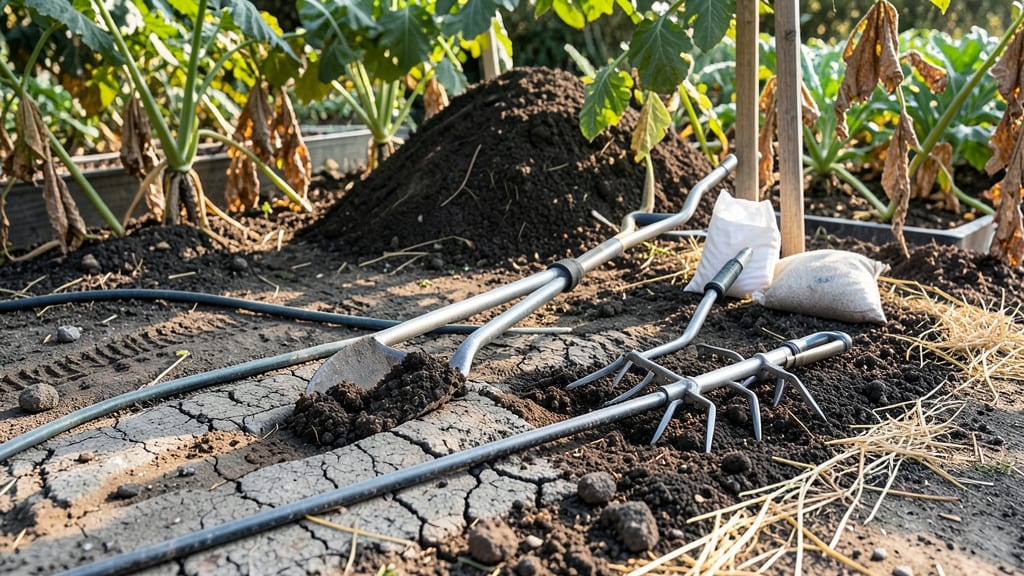
How to fix compacted soil in vegetable garden—roots suffocate, water pools, and plants struggle to grow. 🌱 I’ve spent years digging (literally) through my own hardpan soil, and I’ve found the foolproof way to break it up without wrecking your soil’s structure. The secret? A mix of mechanical aeration and organic boosts that turn dense clay into loose, crumbly earth perfect for roots.
Start with a simple garden fork or broadfork to loosen the top 8–12 inches—no tilling needed. Then, mix in 3–4 inches of compost or well-rotted manure to feed the soil microbes that naturally fluff things up.
For stubborn layers, cover crops like clover or ryegrass work like living aerators, breaking up compaction as they grow. The key is patience: don’t rush it. Healthy soil isn’t built in a weekend.
By the end, your garden beds will hold moisture better, roots will spread freely, and your tomatoes, carrots, and potatoes will grow like they’re in a luxury spa—not a concrete slab.
You’ll see the difference in 2–3 weeks with deeper water penetration and fewer wilting plants. The best part? This method keeps working long after you stop digging.
Pro tip: Walk on your beds occasionally to test firmness—if your boot leaves a deep print, it’s time to repeat the process. And skip the heavy equipment; over-tilling compacts soil even more. Small, consistent effort wins every time.
📚 In This Guide
- What you need
- Instructions
- Tips and common mistakes
- Wrapping up and next steps
What you need
- ● Garden fork or broadfork – A sturdy, heavy-duty fork (6–12 inches wide) for deep aeration. Look for one with square or rectangular tines (avoid pitchforks—they’re too shallow!).
- ● Shovel (round-point or spade) – For breaking up surface compaction and mixing in amendments. A 5–7-inch blade works best.
- ● Garden rake (bow or leaf rake) – A bendable-head rake (for loosening) or a stiff-bristle rake (for leveling). Avoid plastic—it snaps!
- ● Organic matter amendments (pick 1–2): Compost – 2–3 inches per square foot (or 1–2 cubic yards per 100 sq. ft. for deep beds). Aim for mature compost (dark, crumbly, and earthy-smelling).
- ● Peat moss or coconut coir – 1–2 inches mixed into the top 6 inches of soil (great for sandy or clay-heavy soils).
- ● Well-rotted manure – 1–2 inches (chicken, cow, or horse). Avoid fresh manure—it burns plants!
- ● Gypsum (calcium sulfate) – 10–20 lbs per 100 sq. ft. (helps break up clay soils without altering pH).
- ● Water source (hose or sprinkler) – For hydrating soil before and after aeration.
- ● Gloves & knee pads – Protect your hands and joints from thorns, rocks, and fatigue.
- ● Soil test kit – Check pH and nutrient levels before amending (costs ~$20–$50).
- ● Cover crop seeds (e.g., clover, vetch) – Plant after loosening to prevent future compaction.
- ● Mulch (straw, wood chips, or leaves) – 2–3 inches to retain moisture and protect soil.
- ● Hand trowel – For precise adjustments in tight spots.
- ● Wheelbarrow – To haul amendments and debris efficiently.
Step-by-Step instructions for fixing compacted soil in your vegetable garden
Here's how I transform heavy, packed soil into loose, root-friendly earth—no heavy machinery needed.
🌱 Step 1: Test Your Soil's Compactness
Dig a small hole about 6 inches deep with a trowel. If the soil feels hard like clay or resists breaking apart, it's compacted. Press your thumb into the sides—if it leaves a clean imprint that doesn't spring back, your roots are fighting for space. Healthy soil should crumble easily between your fingers.
Check moisture too. Compacted soil often stays soggy for days after rain. If water pools on the surface or drains slowly, that's another sign of poor aeration. This test tells you exactly where to focus your efforts—don't waste time loosening soil that's already ideal.
✂️ Step 2: Break Up the Soil Mechanically
Use a broadfork (or sturdy garden fork) to pierce the soil in a grid pattern, 12-18 inches apart. Drive the tines 8-10 inches deep at a slight angle, then rock the fork back and forth to create vertical channels. This mimics natural root pathways without disturbing the soil surface too much.
Work in dry conditions—wet soil compacts more easily when worked. If your soil is already damp, wait a few days for it to dry slightly first. You'll hear a satisfying "give" as the compacted layers break apart. Repeat this process every 6-12 inches until the entire garden bed feels spongy when pressed.
💧 Step 3: Add Organic Matter to Improve Structure
Spread a 2-3 inch layer of compost or well-aged manure over the bed. Work it into the top 4-6 inches of soil with a rake or your hands. Organic matter acts like tiny sponges, absorbing water and creating air pockets. For stubborn compaction, mix in coarse sand (like builder's sand) at a 1:3 ratio with your existing soil.
Don't skip this step—just aerating won't last. The organic material keeps the soil loose over time by encouraging earthworms and microbial activity. You'll notice the soil darken and smell earthier as beneficial organisms move in. Water the bed lightly after amending to help settle everything in place.
☀️ Step 4: Encourage Long-Term Looseness
Plant a cover crop like clover or winter rye in the off-season. Their roots grow deep, naturally breaking up compacted layers below. When the cover crop blooms, mow it down and let it decompose on the soil surface. This adds even more organic matter without extra work.
After planting vegetables, use mulch (straw or wood chips) to protect the soil from raindrop compaction. Keep foot traffic to paths only—walking on garden beds compresses the soil again. You'll know your efforts are working when water drains evenly and plants grow roots that spread easily rather than struggling downward.
Tips & tricks for perfect soil aeration in your vegetable garden
Took me years to figure out these tricks—your plants will thank you for these simple adjustments that make all the difference.
Tool Technique: When using your broadfork in Step 2, angle the tines slightly backward as you push down. This creates wider channels that mimic natural root pathways. I also recommend working in a diagonal pattern rather than straight lines—this breaks up compaction more thoroughly without disturbing the surface too much. The goal is to create vertical "highways" for roots, not just poke holes.
Timing Secret: The instructions mention working in dry conditions, but here's what nobody tells you—morning is the best time to aerate. Soil is slightly drier after overnight evaporation, and you avoid the midday heat that can make you (and the soil) miserable. If you must work in the afternoon, focus on the shadiest parts of your garden first. You'll notice the broadfork glides more easily in cooler soil.
Organic Matter Hack: For stubborn compaction in Step 3, mix in 1 part coarse sand to 3 parts existing soil—but don't stop there. Add a handful of perlite or vermiculite (optional) to the compost layer. These minerals create instant air pockets while the organic matter builds long-term structure. I've seen gardens transform from hardpan to fluffy in just one season using this combo. Water lightly after mixing to help everything settle.
Long-Term Strategy: The cover crop in Step 4 is your secret weapon, but here's how to maximize it: Plant clover in early spring and winter rye in fall. Clover's shallow roots break up topsoil while winter rye's deep roots tackle subsoil compaction. When you mow them down, leave the cuttings as mulch—they'll decompose and add even more organic matter. This two-pronged approach gives you double the benefits with minimal extra work.
Pro Tips for Fix Compacted Soil In Vegetable Garden
- Took me years to figure out these tricks—your plants will thank you for these simple adjustments that make all the di...
- Tool Technique: When using your broadfork in Step 2, angle the tines slightly backward as you push down. This creates...
- Timing Secret: The instructions mention working in dry conditions, but here's what nobody tells you—morning is the be...
Frequently asked questions
Got questions about reviving your compacted soil? You’re not alone! Here are answers to the most common concerns—so you can get back to growing like a pro.
How do I know if my soil is truly compacted?
Check for these signs: water pools on the surface instead of soaking in, roots look stunted or tangled, or your garden tools (like a trowel) feel like they’re hitting concrete. Press your finger into the soil—if it’s hard or cracks instead of crumbling, it’s compacted. Pro tip: Dig a small test hole (6 inches deep) to see how easily roots can spread!
Can I fix compacted soil in the winter or rainy season?
Yes! Winter is actually a great time to aerate—frozen or waterlogged soil is easier to break up. Use a broadfork or deep tilling tool to loosen the ground when it’s damp (not muddy). Rainy seasons can help too, but avoid working when the soil is soggy. Pro tip: Cover the area with mulch afterward to protect your progress from erosion.
Are there cheaper alternatives to renting a core aerator?
Skip the rental and try these budget-friendly tools:
- Broadfork: A manual, fork-like tool that lifts and loosens soil without turning it over (great for organic gardens).
- Garden fork or pitchfork: Dig deep (12+ inches) in a grid pattern to break up compaction.
- DIY spike aerator: Drive sturdy metal rods (like rebar) into the ground in a grid, then wiggle them side-to-side to create holes.
Will adding compost or manure fix compacted soil instantly?
Nope! While compost and manure improve soil health long-term, they won’t loosen compacted soil on their own. Think of them as the “icing on the cake”—first aerate or till to break up the hardness, then mix in organic matter to help roots thrive. Pro tip: Top-dress with compost after aerating to lock in moisture and nutrients.
Is tilling the same as aerating for compacted soil?
Not quite! Tilling turns over the top layer of soil, which can actually worsen compaction over time by breaking up soil structure. Aerating (with a core aerator or broadfork) creates vertical holes that let roots grow deeper without disrupting the soil’s natural layers. Pro tip: For heavy clay soil, combine aerating with gypsum or sand amendments for best results.
What if my soil stays compacted after trying these fixes?
Persistent compaction might mean deeper issues, like a hardpan layer (a dense, impermeable soil layer). In this case, rent a deep tillage tool or hire a professional to break it up. Alternatively, plant deep-rooted cover crops (like daikon radishes) to naturally fracture the soil over time. Pro tip: Test your soil’s pH and nutrient levels too—sometimes compaction masks other problems!
Wrapping up and next steps
Fixing compacted soil in your vegetable garden is all about patience, the right tools, and a little elbow grease—but the results will be worth every effort! 🌱 By aerating, amending with organic matter, and choosing root-friendly plants, you’ll create a thriving space where your veggies can grow strong and healthy.
Start small, track your progress, and soon, you’ll have soil so loose and fertile, your garden will thank you.
Ready to take the next step? Pick one method from this guide and try it this weekend! Whether it’s a simple fork test or a deeper aeration project, every little improvement makes a difference. Happy gardening! 🌿