
How To
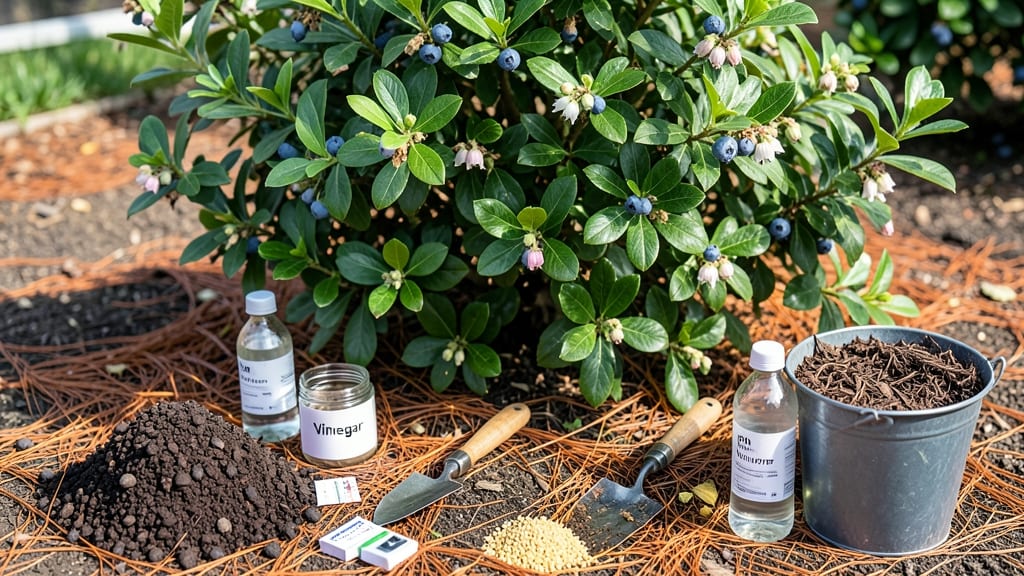
How to make soil more acidic naturally—your blueberries won’t thrive until you lower that pH without chemicals. 🌿 The secret lies in what you already have: coffee grounds, pine needles, and even composted leaves. These organic amendments work slowly but steadily to create the perfect acidic environment for acid-loving plants.
Start with a simple soil test to know your baseline pH. Most acid-loving plants like blueberries, azaleas, and rhododendrons need a pH between 4.5 and 5.5.
Once you know where you stand, you can mix in coffee grounds (a surprising powerhouse) or spread pine needles around plants for a gradual acid boost over months.
Within 3-6 months, you’ll see your soil transforming—darker, richer, and teeming with the microbes these plants crave. The best part? You’re not just fixing the soil; you’re building a thriving ecosystem that keeps giving year after year.
Fair warning: too much too fast can backfire. Test your soil again in 6 months and adjust as needed. This method is gentle, organic, and works even in containers or raised beds. Let’s get those plants the home they deserve!
📚 In This Guide
- What you need
- Instructions
- Tips and common mistakes
- Wrapping up and next steps
What you need
- ● Ready to tweak your soil’s pH without harsh chemicals? Here’s what you’ll need to get started—no fancy tools required! 🌱✨
- ● Pro tip: 💡 Collect free materials! Ask local coffee shops for used grounds, or forage pine needles from landscaped areas (with permission). Just skip needles treated with pesticides.
Step-by-Step guide to lowering soil pH naturally
Here's how I transform garden beds into acid-loving havens using organic amendments—no harsh chemicals needed.
🌱 Step 1: Test Your Soil's Current pH
Before adding anything, grab a soil pH test kit (digital or liquid) and take a sample from 4-6 inches deep. I like to test in multiple spots since pH varies across the garden. Most kits include a color chart—compare your sample's hue to determine your starting pH. Aim for 5.0-6.5 for acid-loving plants like blueberries or azaleas.
If your soil tests above 6.5, you'll need to lower it gradually. I've seen people rush this and end up with aluminum toxicity—always adjust by 0.5-1.0 pH points per season. Write down your starting number; you'll need it to track progress.
🪴 Step 2: Apply Organic Acidifiers to the Soil
Spread 3-4 inches of pine needles (fresh or composted) evenly over the garden bed. These release tannic acid as they break down, lowering pH slowly. I like to work them into the top 2-3 inches of soil using a garden fork. For containers, mix 1 part pine needles to 3 parts soil—they decompose faster in small spaces.
Next, sprinkle ½ cup of used coffee grounds per square foot of bed. Coffee's acidity comes from its caffeine content, but don't overdo it—too much can create a nitrogen imbalance. Work these into the soil too, then water thoroughly. The grounds will break down within 2-4 weeks, releasing their acidifying effects.
☀️ Step 3: Incorporate Peat Moss for Long-Term Adjustment
Add 1-2 inches of sphagnum peat moss to the surface and mix it into the top 6 inches of soil. Peat moss holds onto hydrogen ions, gradually lowering pH over time. I prefer to apply it in early spring so it has the growing season to work. For containers, blend 20% peat moss with your existing potting mix.
Water the amended soil until moisture reaches 6 inches deep. The goal is to saturate the entire amended layer so the acidifiers can start working immediately. Avoid overwatering—you want damp soil, not soggy. Let it drain completely before planting acid-loving species.
⏰ Step 4: Monitor and Maintain pH Over Time
Wait 4-6 weeks after amending, then test your soil pH again. You should see a drop of 0.5-1.0 points if conditions were right. If not, repeat the process with fresh amendments. I test every 3-4 months during the growing season to keep pH stable—especially important for plants like hydrangeas that change color with pH shifts.
For ongoing maintenance, top-dress with ½ inch of pine needles annually in fall. This prevents pH from drifting upward naturally. Avoid lime or wood ash completely—they raise pH and undo all your work. If your soil tests too acidic (below 5.0), mix in composted leaf mold to buffer it gently.
🌿 Step 5: Plant Acid-Loving Species Strategically
Once your soil reaches the target pH, plant acid-loving species in the amended areas. Blueberries, azaleas, and rhododendrons thrive at 4.5-5.5 pH, while hydrangeas prefer 5.0-6.0. I always plant these in the spots where I've done the most amending to ensure they get the right conditions from day one.
Mulch heavily with pine straw or wood chips to maintain acidity. This keeps the soil consistently moist and slows down pH drift. Watch your plants' leaves—they'll tell you if you've got it right. Blueberries with dark green leaves and no yellowing? You've nailed it.
Tips & tricks for perfect acidic soil transformation
Transforming your garden soil into an acid-loving haven takes patience and precision—here's how to maximize your efforts without common pitfalls.
Testing Accuracy: For the most reliable pH reading in Step 1, test your soil after a light rain or thorough watering. Dry soil can give false readings that are up to 0.5 points higher than actual pH. I like to test in the morning when soil moisture is consistent. Keep a garden journal to track your starting pH and progress over time—this prevents overcorrecting and potential aluminum toxicity from aggressive pH drops.
Layering Strategy: When applying the 3-4 inches of pine needles in Step 2, create a "sandwich" effect by placing half the needles on the soil surface, then mixing in the ½ cup coffee grounds per square foot, and finishing with the remaining needles. This layered approach ensures even distribution of acidifiers throughout the amended zone. For containers, I've found that mixing the pine needles directly into the potting mix at a 1:3 ratio works better than layering due to limited space.
Peat Moss Application: The 1-2 inches of sphagnum peat moss in Step 3 should be fluffed before spreading—compressed peat moss loses its acidifying capacity. I like to spread it while the soil is slightly damp (from your initial watering) to help it adhere better. For containers, pre-mix the 20% peat moss with your existing potting mix in a wheelbarrow before repotting—this ensures even distribution without clumping. The peat moss will darken your soil, which is normal and actually helps retain moisture.
Monitoring System: Set a recurring reminder to test your soil every 3-4 months as mentioned in Step 4. I use a simple whiteboard in my garden shed to track pH levels alongside plant growth observations. If you notice yellowing leaves on acid-loving plants despite proper pH, check for aluminum toxicity—a sign you've lowered pH too quickly. In this case, mix in composted leaf mold to buffer the soil gently and prevent plant stress.
Pro Tips for Make Soil More Acidic Naturally
- Transforming your garden soil into an acid-loving haven takes patience and precision—here's how to maximize your effo...
- Testing Accuracy: For the most reliable pH reading in Step 1, test your soil after a light rain or thorough watering....
- Layering Strategy: When applying the 3-4 inches of pine needles in Step 2, create a "sandwich" effect by placing half...
Frequently asked questions
Got questions about lowering your soil’s pH naturally?
You’re not alone! Here are answers to the most common concerns—so you can garden with confidence.
How long does it take to see results?
Patience is key! Most natural amendments (like pine needles or coffee grounds) take 2–6 weeks to show measurable pH changes, depending on soil type and climate. Test your soil every 4–6 weeks to track progress. For faster results, mix amendments deeply into the top 6–8 inches of soil.
Can I over-acidify my soil?
Yes—but it’s rare with natural methods. Overdoing it (e.g., dumping too many pine needles or sulfur) can harm beneficial microbes and plants like azaleas or blueberries. Aim for a pH of 4.5–6.0; test monthly until you hit your target. If in doubt, less is more!
Will this harm my worms or beneficial microbes?
Not if done right! Extreme acidity (below pH 4.5) can stress earthworms, but natural amendments like composted leaves or peat moss are gentle. Avoid raw materials (e.g., fresh pine needles) and always water thoroughly after adding amendments to buffer the change.
What’s a quick fix for urgent pH needs?
For fast results, use elemental sulfur (1–2 lbs per 100 sq ft) or vinegar (1 cup per gallon of water, applied lightly). However, these are short-term solutions—combine with organic matter (like oak leaves or pine bark) for long-term balance.
Can I use these methods for container gardens?
Container soil heats up faster and dries out quicker, so monitor pH closely. Mix 1 part pine needles or coffee grounds into 3 parts potting mix, and water with lemon juice (diluted 1:10) every 2–3 months. Drain excess liquid to avoid root rot.
Pro tip: Keep a soil pH journal! Note when you add amendments, rainfall, and test results to refine your approach over time.
Wrapping up and next steps
Transforming your soil into a thriving, acidic haven is simpler than you think—just with natural ingredients like coffee grounds and pine needles! 🌱 By following these easy steps, you’ll create the perfect environment for acid-loving plants like blueberries, azaleas, and hydrangeas.
The key is consistency and patience, but the results—lush, vibrant growth—are totally worth it.
Ready to see your garden flourish? Start small with one method, monitor your soil’s pH over a few weeks, and adjust as needed. Happy gardening—your plants will thank you! 🌿