
Fertilization
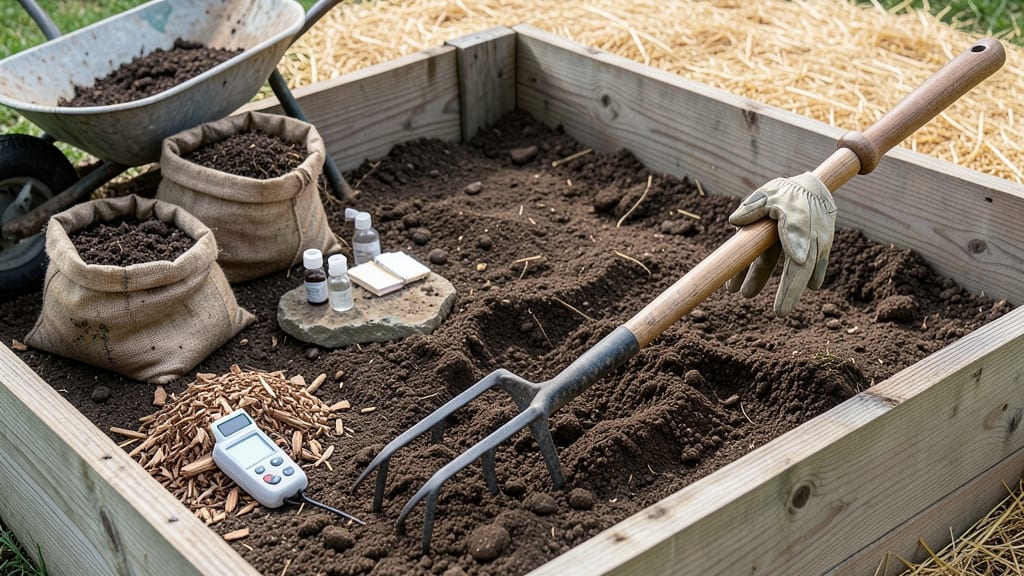
Preparing your soil in winter is the secret weapon for a spring garden that grows like nothing before. 🌱 I used to think winter was just a waiting game, but now I know it’s when the real magic happens—below the frost line, where roots will thrive next season.
The process starts with a simple soil test to know what your earth is missing. Most gardeners skip this step, but it tells you exactly how much compost, manure, or other amendments to add.
Think of it like giving your soil a winter tune-up—looser texture, better drainage, and nutrients ready to feed spring plants. By spring, you’ll have soil that crumbles between your fingers, holds moisture without drowning roots, and supports plants that grow stronger and faster than ever.
The key is working with the cold, not against it—mulching to insulate, adjusting drainage, and protecting vulnerable beds. This method works in every climate, from heavy frosts to mild winters. Let’s get your soil ready for the growing season ahead!
📚 In This Guide
- What you need
- Instructions
- Tips and common mistakes
- Wrapping up and next steps
What you need
- ● Garden fork or broadfork: A sturdy, bypass-pronged fork (18–24 inches long) to aerate soil without turning it over. (2–3 for larger gardens)
- ● Shovel: A round-point or spade shovel (12–14 inches wide) for digging and amending soil. (1–2)
- ● Rake: A bow rake (for leveling) or leaf rake (for debris removal). (1)
- ● Garden gloves: Heavy-duty, waterproof gloves to protect your hands. (1–2 pairs)
- ● Compost: Well-aged, 1–2 inch-deep layer of compost or aged manure (avoid fresh manure—it can burn plants!). (5–10 gallons, depending on garden size)
- ● Organic matter: Options like leaf mold, straw, or peat moss (if your soil is sandy) to improve structure.
- ○ Soil test kit: A DIY test kit (like Mycorrhizal Applications or LaMotte) to check pH and nutrient levels. (Optional but recommended)
- ● Soil conditioners: Products like humic acid, biochar, or vermiculite to boost fertility or drainage.
- ● Mulch: Straw, wood chips, or shredded leaves (3–4 inches deep) to protect soil over winter.
- ● Cover crops: Seeds for clover, winter rye, or vetch to prevent erosion and add nitrogen.
- ● Irrigation tools: A hose with a gentle spray nozzle or soaker hose to moisten soil before amending.
- ● Knee pad or stool: For comfort during long sessions! 😉
Step-by-Step instructions for winter soil preparation
Here’s how I transform winter soil into a spring-ready powerhouse—no heavy machinery needed.
🌱 Step 1: Clear and Assess the Garden Bed
Start by removing any dead plants, weeds, or debris from the area. I like to use a sturdy garden fork to lift out stubborn roots—this prevents them from decomposing and spreading seeds next season. Rake the surface lightly to expose the bare soil, which helps you spot any hidden issues like pests or compacted spots.
Look for signs of last season’s neglect: crusty soil, bare patches, or uneven texture. These are your clues about where to focus extra attention. If you see fungal mats or mold, note those spots—they’ll need extra care to restore balance.
🪴 Step 2: Loosen Compacted Soil Without Overworking It
Use a broadfork or digging fork to gently break up the top 6-8 inches of soil. The goal is to create channels for air and water without turning the soil into a powder. I work in sections, inserting the fork at a slight angle and levering it open like a wedge. This mimics natural root movement and prevents compaction.
Stop when the soil crumbles easily between your fingers—overworking it releases too many nutrients at once, which can encourage weeds. If the soil feels like concrete, it’s time to add organic matter (like compost or aged manure) to rebuild structure.
💧 Step 3: Add Organic Matter for Winter Breakdown
Spread a 1-2 inch layer of compost, well-aged manure, or leaf mold over the bed. I prefer compost because it’s ready to work immediately, but leaf mold adds fantastic structure over time. Work it into the top 3-4 inches of soil with a rake or your hands—no need to dig deeply.
This isn’t just about nutrients; it’s about feeding the soil’s microbial life. Microbes break down organic matter over winter, creating fluffy, aerated soil by spring. Water lightly after adding amendments to help them settle and start decomposing.
☀️ Step 4: Protect and Mulch for Winter Conditions
Cover the bed with a 3-4 inch layer of straw, shredded leaves, or wood chips. This mulch insulates the soil, preventing extreme temperature swings that can damage roots and soil structure. I avoid thick layers of fresh wood chips—they can tie up nitrogen as they break down.
Leave gaps around perennial plants to prevent rot, but keep the mulch thick enough to block weeds. In colder climates, add a layer of cardboard or burlap over the mulch for extra insulation. By spring, you’ll have a soft, crumbly bed ready for planting.
⏰ Step 5: Schedule a Light Spring Top-Dressing
Mark your calendar for 4-6 weeks before your last frost date to add a final layer of compost or a balanced organic fertilizer. This gives microbes time to activate and roots time to establish before active growth begins. I like to sprinkle a handful of bone meal or kelp meal around perennials for extra phosphorus and trace minerals.
Don’t skip this step—it’s the difference between soil that’s “good enough” and soil that’s a spring launchpad for your plants. A quick raking to mix in the amendments is all it takes.
Tips & tricks for perfect winter soil preparation
Here's what nobody tells you about transforming winter soil into spring gold—these are the details that make all the difference.
Tool Selection Matters: That sturdy garden fork in Step 1 isn't just for show—it's the difference between a quick clean-up and a battle with stubborn roots. I've tried cheap forks that bend, but investing in a heavy-duty one with strong tines makes the work feel like half the effort. For larger beds, consider a broadfork which creates those perfect air channels with less strain on your back.
Soil Texture Test: In Step 2, when you're deciding whether to stop loosening, grab a handful of soil and squeeze it gently. If it crumbles easily between your fingers but holds its shape when you open your hand, you've hit the perfect texture. If it falls apart completely, you've overworked it—this is when you know it's time to add that 1-2 inch layer of compost from Step 3. The goal is fluffy, not powdery.
Mulch Layer Strategy: That 3-4 inch mulch layer in Step 4 isn't just about insulation—it's a winter feeding frenzy for your soil's microbial army. I like to create small "mulch donuts" around perennial plants by leaving a 2-inch gap at the base. This prevents rot while still blocking weeds. For extra protection in freezing climates, add a layer of burlap over the mulch—it acts like a thermal blanket for your soil.
Spring Prep Timeline: Marking your calendar 4-6 weeks before last frost isn't just about remembering—it's about giving your soil's microbes a head start. I set reminders on my phone for this date because that final top-dressing is what transforms "good enough" soil into a powerhouse. Think of it like giving your garden a vitamin shot before the big race begins.
Pro Tips for Prepare Soil In Winter For Spring
- Here's what nobody tells you about transforming winter soil into spring gold—these are the details that make all the ...
- Tool Selection Matters: That sturdy garden fork in Step 1 isn't just for show—it's the difference between a quick cle...
- Soil Texture Test: In Step 2, when you're deciding whether to stop loosening, grab a handful of soil and squeeze it g...
Frequently asked questions
Got questions about winter soil prep? You’re not alone! Here are answers to the most common concerns—so you can tackle spring gardening with confidence.
Can I still prepare my soil if it’s frozen or snow-covered?
Yes, but with a few adjustments! Avoid working frozen ground—it can compact and damage soil structure. Instead, focus on above-ground tasks like spreading compost, mulching, or planning your garden layout. Once the ground thaws (usually in late winter), you can till or loosen it gently. If snow covers your soil, let it melt naturally to avoid disrupting the ecosystem beneath.
What’s the best time of winter to start soil prep?
Start as early as late fall (October–November) for heavy-duty tasks like compost incorporation or deep tilling. If your winter is mild, you can work into December or even January. However, avoid prepping too close to spring (February–March) unless you’re doing light tasks like mulching or adding organic matter. The key is to give nature time to break down amendments before planting.
Are there budget-friendly alternatives to expensive soil amendments?
Skip pricey fertilizers and try these cost-effective swaps:
- Compost: Make your own from kitchen scraps and yard waste (free!).
- Leaf mold: Collect fallen leaves, dampen them, and let them decompose for a nutrient-rich addition.
- Manure: Cow, horse, or chicken manure (aged or composted) is packed with nutrients and often free from local farms.
- Green manure: Plant cover crops like clover or winter rye in fall—they’ll improve soil structure and add nitrogen when tilled in spring.
Will winter soil prep work in cold climates with short growing seasons?
Yes! Cold climates actually benefit from winter prep because the freeze-thaw cycle helps break down amendments naturally. Focus on:
- Adding organic matter (like compost or mulch) to insulate roots and improve drainage.
- Covering beds with straw or leaves to protect soil from erosion and compaction.
- Testing soil pH in winter (if possible) and planning amendments for early spring.
What if my soil is already compacted or clay-heavy? Can winter prep fix it?
Winter is a great time to start improving compacted or clay soil, but results take time. Try these steps:
- Add gypsum or lime (if your soil is too acidic) to break up clay and improve structure.
- Incorporate coarse materials like sand or perlite (sparingly!) to loosen clay.
- Plant deep-rooted cover crops (like daikon radishes) to aerate soil naturally.
- Avoid tilling when wet—this makes clay soil worse. Wait for dry spells or use a broadfork to loosen soil gently.
Wrapping up and next steps
Preparing your soil in winter is like laying the foundation for a thriving spring garden—a little effort now means big rewards later! 🌱 By testing, amending, and protecting your soil, you’re giving your plants the best possible start.
Don’t let the cold weather slow you down; winter is the perfect time to work smarter, not harder.
Ready to take the next step? Grab your tools, roll up your sleeves, and get started! Your future garden will thank you—and so will you when those first spring blooms pop up. 🌿