
How To
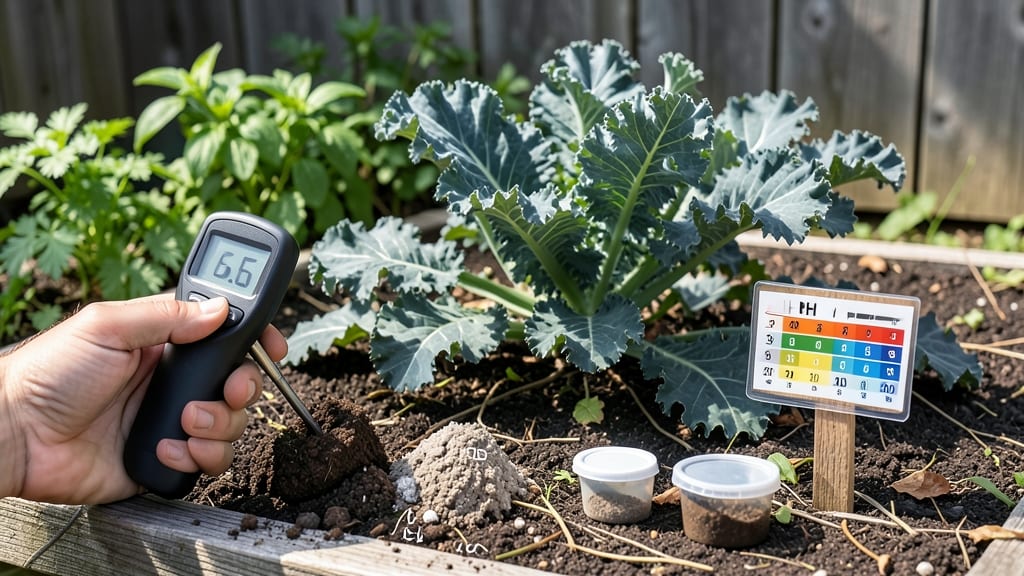
My kale thrives in the kale soil pH tolerance that’s slightly acidic—around 6.0 to 7.0 pH—where the real magic happens for those deep green leaves. 🌱 I learned the hard way that kale wilts when soil pH drifts too far, whether too alkaline or acidic, because nutrient uptake suffers.
The secret isn't just testing your soil—it's adjusting it with the right amendments to keep those leaves crisp and productive.
Testing soil pH is easier than you think: grab a simple home test kit or send a sample to your local extension office. Most garden soil tests run around $20, and the results tell you exactly how far your soil is from that sweet spot.
Once you know, you can tweak it with sulfur to lower pH or lime to raise it—but kale’s forgiving nature means you don’t need perfect precision.
What you’ll notice after adjusting is bold, vibrant growth—leaves stay thick and sweet, not bitter or stunted. The soil itself smells rich and alive, not sour or chalky. Even in cooler months, your kale will keep producing because the roots access all the nutrients they need.
This works for both in-ground beds and containers, whether you're growing in raised beds or 5-gallon pots. The key is consistency: monitor pH every 6-12 months, especially if you’ve added compost or organic matter. Small adjustments keep your kale happy season after season.
📚 In This Guide
- What you need
- Instructions
- Tips and common mistakes
- Wrapping up and next steps
What you need
- ● Soil pH testing kit – Digital or liquid test strips (e.g., Luster Leaf or MySoil for accuracy).
- ● Garden trowel or soil sampler – For collecting 5–10 soil samples (6 inches deep) from different garden areas.
- ● pH adjusters: Lime (pelletized or hydrated) – 1–2 lbs per 100 sq ft to raise pH (if soil is acidic).
- ● Sulfur (elemental or aluminum sulfate) – ½–1 lb per 100 sq ft to lower pH (if soil is alkaline).
- ● Compost or well-aged manure – 2–3 inches mixed into soil to improve fertility and buffer pH naturally.
- ● Garden gloves & bucket – For handling soil and amendments safely.
- ● pH meter – For real-time readings (calibrate annually for precision).
- ● Soil moisture meter – Kale prefers moist (not soggy) soil; aim for 60–70% moisture.
- ● Organic matter tester – Ensures your soil has 3–5% organic content for ideal nutrient retention.
- ● Rainwater or distilled water – For rinsing tools and diluting liquid pH test solutions.
- ● Choose a sunny spot (kale needs 4–6 hours of sunlight daily).
- ● Test soil 2–3 weeks before planting to allow amendments time to work.
- ● Check local climate and rainfall patterns—some regions need more frequent pH adjustments.
How to optimize soil pH for kale growth
Kale thrives when soil pH is just right—here’s how to create the perfect conditions for your greens.
🌱 Step 1: Test Your Soil’s Current pH Level
Before making any changes, grab a soil pH test kit (available at garden centers) and take a sample from your planting area. Kale prefers a slightly acidic to neutral range of 6.0 to 7.0. Dig a small hole about 6 inches deep, collect a handful of soil, and follow the kit’s instructions for testing.
If your soil tests outside this range, don’t panic—most garden soils can be adjusted with simple amendments. I’ve found that urban garden soils often run too alkaline (above 7.0), while forest garden beds tend to be too acidic (below 6.0). Write down your results so you know exactly what to adjust.
💧 Step 2: Adjust pH Based on Test Results
For soils testing below 6.0 (too acidic), sprinkle garden lime (calcium carbonate) evenly over the planting area. Work it into the top 6 inches of soil using a garden fork. Aim for 1-2 pounds of lime per 100 square feet—this is enough to raise pH by about 1 point. Water the area thoroughly after amending to help the lime integrate.
If your soil tests above 7.0 (too alkaline), add elemental sulfur or peat moss to lower pH. Mix 1-2 pounds of sulfur per 100 square feet into the top 6 inches of soil, or spread 2-3 inches of peat moss and till it in. Both methods take 4-6 weeks to fully adjust pH, so plan ahead if you’re planting soon.
☀️ Step 3: Maintain Ideal pH Through the Growing Season
Kale grows best when soil pH stays within the 6.0-7.0 range, but it’s not set-and-forget. Test your soil again 4-6 weeks after amending to confirm the adjustment worked. If needed, repeat the process—small tweaks are easier than drastic fixes later.
To keep pH stable, avoid over-fertilizing with manure or compost high in nitrogen, which can acidify soil over time. Instead, use a balanced organic fertilizer (like 5-5-5) to feed your kale without disrupting pH. Mulch with straw or wood chips to prevent soil erosion and maintain moisture, which helps roots access nutrients more efficiently.
✂️ Step 4: Monitor Kale Growth for pH-Related Signs
Healthy kale leaves are dark green, crisp, and slightly waxy. If you notice yellowing between leaf veins (chlorosis), your soil may be too alkaline or lacking micronutrients like iron. For purple or red tinges in leaves, the soil might be too acidic or lacking phosphorus.
Adjustments don’t happen overnight—give your plants 2-3 weeks to show improvement after amending. If issues persist, retest the soil and consider adding chelated iron for alkaline soils or bone meal for acidic soils. Kale is forgiving, but it rewards precise care with sweeter, more tender leaves.
Tips & tricks for perfect kale soil pH balance
Getting your soil just right for kale is half the battle—here's how to avoid common pitfalls and get the most out of your greens.
Testing Accuracy: Soil pH test kits vary in precision, so for best results, test your soil in multiple spots around your garden. I’ve found that urban soils often show wildly different readings just a few feet apart—take an average of 3-5 samples for reliable data. If you’re planting in containers, test the potting mix too, as it can behave differently than garden soil.
Lime Application: When adjusting acidic soil (below 6.0) with garden lime, don’t rush the process. Spread the 1-2 pounds per 100 square feet evenly and water thoroughly, but avoid heavy rain immediately after application. I learned this the hard way—lime washed away during a downpour, and I had to reapply. A light mulch layer after amending helps prevent erosion while the lime integrates.
pH Adjustment Timing: Remember that elemental sulfur and peat moss take 4-6 weeks to fully adjust pH, so plan your planting schedule accordingly. If you’re in a hurry, you can use aluminum sulfate for faster acidification (works in about 2 weeks), but it’s more aggressive. For alkaline soils, I’ve had success with a mix of sulfur and pine needles—both help lower pH naturally over time.
Visual Growth Cues: Kale’s leaves tell you everything about soil health. Beyond the classic yellowing (chlorosis) for alkaline soils, watch for brittle stems when soil is too acidic. The 2-3 week adjustment window mentioned in Step 4 is crucial—don’t expect instant results, but you should see visible improvements in leaf color and texture within that timeframe if your pH is now in the 6.0-7.0 range.
Pro Tips for Kale Soil Ph Tolerance
- Getting your soil just right for kale is half the battle—here's how to avoid common pitfalls and get the most out of your greens.
- Testing Accuracy: Soil pH test kits vary in precision, so for best results, test your soil in multiple spots around your garden.
- Lime Application: When adjusting acidic soil (below 6.0) with garden lime, don’t rush the process.
Frequently asked questions
What’s the ideal soil pH range for kale?
Kale thrives in slightly acidic to neutral soil, with an ideal pH range of 6.0 to 7.0. While it can tolerate pH levels as low as 5.5 or as high as 7.5, growth and nutrient uptake may suffer outside this range. Test your soil with a simple kit to fine-tune it—your kale will thank you with bigger, tastier leaves!
How do I adjust my soil pH if it’s too acidic or alkaline?
For acidic soil (pH < 6.0), mix in lime (calcium carbonate) or wood ash to raise pH gradually. For alkaline soil (pH > 7.0), add sulfur, peat moss, or pine needles to lower it. Pro tip: Adjust pH 2-3 months before planting—kale won’t tolerate sudden shifts. Always amend in layers and water thoroughly to distribute amendments evenly.
Can I grow kale in high-pH soil, or will it fail?
Kale can grow in slightly alkaline soil (up to pH 7.5), but it may struggle to absorb key nutrients like iron, manganese, and phosphorus, leading to yellowing leaves or stunted growth. If your soil is above 7.5, consider growing pH-tolerant varieties like ‘Winterbor’ or ‘Red Russian’ and focus on improving drainage and organic matter to buffer pH spikes.
What are signs my kale isn’t happy with the soil pH?
Watch for these red flags:
- Yellowing leaves (chlorosis): Often a sign of high pH blocking iron uptake.
- Purple stems/veins: Could indicate phosphorus deficiency in alkaline soil.
- Slow growth or small leaves: Likely due to nutrient stress from poor pH balance.
Are there pH-tolerant kale varieties for tricky soils?
Yes! If your soil pH is mildly off, try these resilient varieties:
- ‘Lacinato (Dinosaur)’: Handles slightly acidic to neutral soil well.
- ‘Red Russian’: Tolerates mild alkalinity (up to pH 7.5) better than most.
- ‘Winterbor’: Cold-hardy and adaptable to pH 5.5–7.0.
Wrapping up and next steps
Growing thriving kale doesn’t have to be a guessing game—understanding its soil pH tolerance (5.0–7.0) is your secret weapon! 🌱 With the right soil prep, amendments, and testing tools, you’re well on your way to a bountiful harvest.
Whether you’re adjusting acidic or alkaline soil, small tweaks can make a big difference.
Ready to put your newfound knowledge into action? Test your soil today and give your kale the perfect growing conditions. Happy gardening—your taste buds (and plants!) will thank you! 🥬✨