
Neem Oil
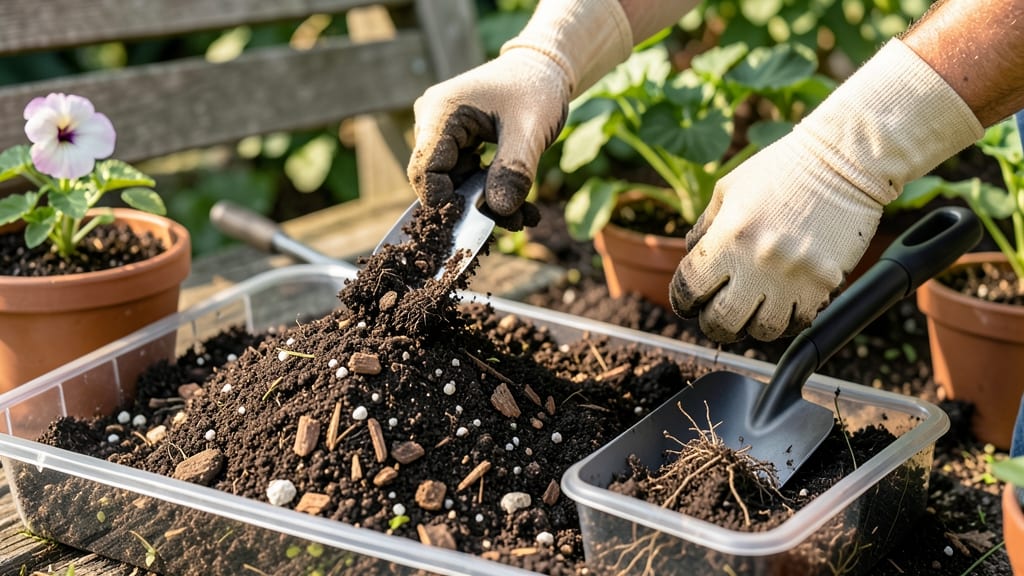
A professional potting soil mix transforms struggling container plants into lush, thriving giants—no black thumb required. 🌱 The secret lies in its airy structure, designed to prevent soggy roots while holding just enough moisture for roots to breathe.
My first attempt with store-bought "soil" left my ferns drowning in compacted dirt, but switching to this blend changed everything. This mix isn’t just dirt—it’s a science-backed blend of peat moss, perlite, vermiculite, and compost, each playing a role in drainage, aeration, and nutrients.
For seedlings, I add extra perlite to keep roots light and airy; for heavy feeders like tomatoes, I boost the compost. The result? Plants that grow faster, stay healthier, and produce more—even in small pots.
You’ll notice the difference within 2-3 weeks: fewer wilting leaves, stronger stems, and roots that explore the pot instead of circling in despair. The blend works for everything from herbs to orchids, as long as you match the mix to your plant’s needs.
No more guessing whether your plants are thirsty or suffocating. For DIYers, start with equal parts peat moss and compost, then add 20% perlite or coconut coir. The key is balance—too much perlite drains too fast, too little compost starves your plants.
Test your mix by squeezing a handful: it should hold shape but crumble easily. Here’s how to get it right the first time.
📚 In This Guide
- What you need
- Instructions
- Tips and common mistakes
- Wrapping up and next steps
What you need
- ● 50% Peat Moss or Coco Coir – 2 parts (holds moisture, improves aeration)
- ● 25% Perlite or Pumice – 1 part (boosts drainage and root growth)
- ● 25% Vermiculite – 1 part (retains moisture and nutrients)
- ● Compost or Worm Castings – 1 cup per 5 gallons (adds organic nutrients)
- ○ Slow-Release Fertilizer – 1 tbsp per 5 gallons (optional but recommended for long-term growth)
- ● Large mixing container (5-gallon bucket or wheelbarrow)
- ● Garden gloves (to protect your hands)
- ● Hand trowel or mixing shovel
- ● Measuring cups or scales (for precision)
- ○ Fine mesh sifter (optional, for smoother texture)
- ● Neem Cake or Biochar – ½ cup per 5 gallons (enhances soil health)
- ● Mycorrhizal Fungi – 1 tsp per 5 gallons (boosts root development)
- ● Hydrogel Crystals – 1 tsp per 5 gallons (retains extra moisture)
How to create a professional potting soil mix for container plants
This is the blend I use for every container garden—light, fluffy, and packed with air pockets for roots to thrive.
🌱 Step 1: Measure and Combine Base Ingredients
Start with 4 parts peat moss or coconut coir—this holds moisture while allowing airflow. I like coconut coir because it’s renewable and drains better than peat. Add 2 parts perlite (the white, popcorn-like pieces) to create those crucial air pockets. Mix these together in a large wheelbarrow or clean bucket until evenly distributed.
Next, add 1 part vermiculite—this holds moisture and nutrients while keeping the mix loose. If you’re using peat moss, add 1 part compost (well-aged, not fresh) for nutrients. For coconut coir, which is more sterile, I boost nutrition with ½ part worm castings instead. Sift the mix to break up any clumps—this ensures even moisture distribution later.
💧 Step 2: Customize for Plant Type
For succulents and cacti, add 1 extra part coarse sand (like builder’s sand) to improve drainage. These plants hate soggy roots, so the extra grit prevents compaction. Mix it in gently—too much sand can wash away nutrients, so keep it balanced.
For heavy feeders like tomatoes or peppers, stir in ½ part balanced organic fertilizer (like 5-5-5) or 1 tablespoon of kelp meal per gallon of mix. This gives plants a slow-release nutrient boost without overwhelming them. If your plants are flowering, add ½ part composted bark—it’s slightly acidic and mimics forest floor conditions.
✂️ Step 3: Test and Adjust for Ideal Texture
Grab a handful of the mix and squeeze it firmly. It should hold together slightly but crumble when you open your hand—this is the perfect balance of moisture retention and drainage. If it feels too dense, add ¼ part perlite and remix. If it’s too loose, sprinkle in 1 part compost and fluff it up again.
Drop a few drops of water on the surface. They should sink in within 2-3 seconds without forming puddles. If water beads up, you’ve got too much clay or not enough perlite. If it absorbs instantly, add 1 part coconut coir to improve moisture retention. This test ensures your mix won’t dry out plants or suffocate roots.
☀️ Step 4: Store and Use Immediately
Keep your mix in a sealed container (like a 5-gallon bucket with a lid) in a dry, shaded spot. It’ll stay fresh for 3-6 months, but add ½ part compost if you’re storing it longer than 2 months to replenish nutrients. Before using, give it a quick stir—settling can happen over time.
Fill your containers ¾ full with the mix, leaving room for roots to expand. Tap the pot gently to eliminate air pockets, then water until moisture runs out the drainage holes. This pre-moistening helps roots establish faster. Use your new mix within 2 weeks for peak performance—fresh blends work best!
Tips & tricks for perfect potting soil mix
Between us, the difference between a thriving container garden and one that struggles often comes down to these simple but critical adjustments.
Base Ingredient Balance: The 4:2:1 ratio of peat moss/coconut coir to perlite to vermiculite is non-negotiable for that perfect air-to-moisture balance. I've learned the hard way that skipping the vermiculite makes the mix too dry, while too much perlite can make it drain too quickly. For best results, weigh your ingredients using a kitchen scale if possible—volume measurements can vary wildly between brands.
Customization for Plant Needs: When adding the extra part of coarse sand for succulents, make sure it's builder's sand—not playground sand. The gritty texture is what prevents compaction, but regular sand can compact and suffocate roots. For heavy feeders, I recommend pre-mixing the fertilizer into the compost before adding it to the blend—this ensures even distribution throughout the entire mix.
Texture Testing Made Simple: The squeeze test in Step 3 is your best friend. If your mix feels like wet sand, you need more coconut coir or compost to improve moisture retention. If it feels like packing dirt, add that ¼ part perlite and remix thoroughly. Pro tip: Do this test after every adjustment—it only takes 10 seconds but prevents costly mistakes with your plants.
Storage Wisdom: That 3-6 month shelf life assumes you're storing it in a sealed container away from moisture. I keep mine in a 5-gallon bucket with a tight lid, and I always add a handful of dry perlite to the top before sealing—this prevents the mix from becoming compacted over time. Before using stored mix, give it a thorough stir and do the water test again to ensure it hasn't lost its ideal texture.
Pro Tips for Professional Potting Soil Mix
- Between us, the difference between a thriving container garden and one that struggles often comes down to these simpl...
- Base Ingredient Balance: The 4:2:1 ratio of peat moss/coconut coir to perlite to vermiculite is non-negotiable for th...
- Customization for Plant Needs: When adding the extra part of coarse sand for succulents, make sure it's builder's san...
Frequently asked questions
Got questions about crafting the perfect professional potting soil mix? You’re not alone! Here are answers to the most common queries—from beginners to seasoned gardeners—to help you grow with confidence.
What’s the best ratio for a DIY air-pocket-rich potting mix?
A balanced blend typically uses 60% organic matter (peat moss, coconut coir, or compost), 30% perlite or vermiculite (for aeration), and 10% sand or horticultural grit. Adjust ratios based on your plants—succulents need more grit, while heavy feeders (like tomatoes) thrive with extra compost. Pro tip: Test drainage by squeezing a handful—it should crumble, not clump!
How long does a homemade potting mix last before it degrades?
With proper storage (dry, sealed container, and cool/dark space), your mix can last 6–12 months. Organic components like peat moss break down faster, while mineral additives (perlite) stay stable. Refresh by adding compost or worm castings before reuse. Watch for: foul smells or mold—toss it and start fresh!
Is it cheaper to buy pre-mixed soil or make my own?
DIY mixes are cost-effective long-term if you garden frequently, but pre-mixed bags win for convenience. A 10-gallon bag of store-bought mix costs ~$5–$10, while homemade ingredients (peat moss + perlite) run ~$3–$7 per batch. Break-even point: ~5–10 batches. For large-scale projects, bulk-buying materials saves cash!
Can I reuse old potting soil? What’s the catch?
Reusing soil is eco-friendly but risky—pathogens, salt buildup, and depleted nutrients can harm plants. Sterilize first: Bake in the oven (200°F for 30 mins) or solarize (cover with plastic for 4–6 weeks). Mix with 20–30% fresh compost to revive fertility. Avoid reusing soil from diseased plants without treatment.What’s a quick fix if my mix is too dense or waterlogged?
Amend it with coarse sand, perlite, or orchid bark (1 part additive to 3 parts soil) to improve drainage. For compacted mixes, fluff with a fork and add worm castings or coconut coir to lighten texture. Test fix: Water should drain within 10–15 minutes—if not, add more aeration!
Are there plant-specific potting mixes I should avoid?
Yes! Avoid general-purpose mixes for:
- Succulents/cacti: Skip peat-heavy blends (retains too much moisture). Use 70% mineral grit + 30% compost.
- Orchids: Need bark-based mixes (never garden soil).
- Vegetables: Heavy feeders (like peppers) need high compost content (40–50%).
Wrapping up and next steps
Choosing the right professional potting soil mix is the secret to vibrant, healthy container gardens that thrive year-round. By blending ingredients like coconut coir, perlite, and composted materials, you create an airy, nutrient-rich foundation that supports strong root growth and prevents waterlogging.
Whether you're a seasoned gardener or just starting, this DIY approach ensures your plants get the best possible start—without the guesswork!
Ready to elevate your green space? Grab your materials, roll up your sleeves, and get mixing! Your plants will thank you with lush foliage and bountiful blooms. Happy planting! 🌱✨