
How To
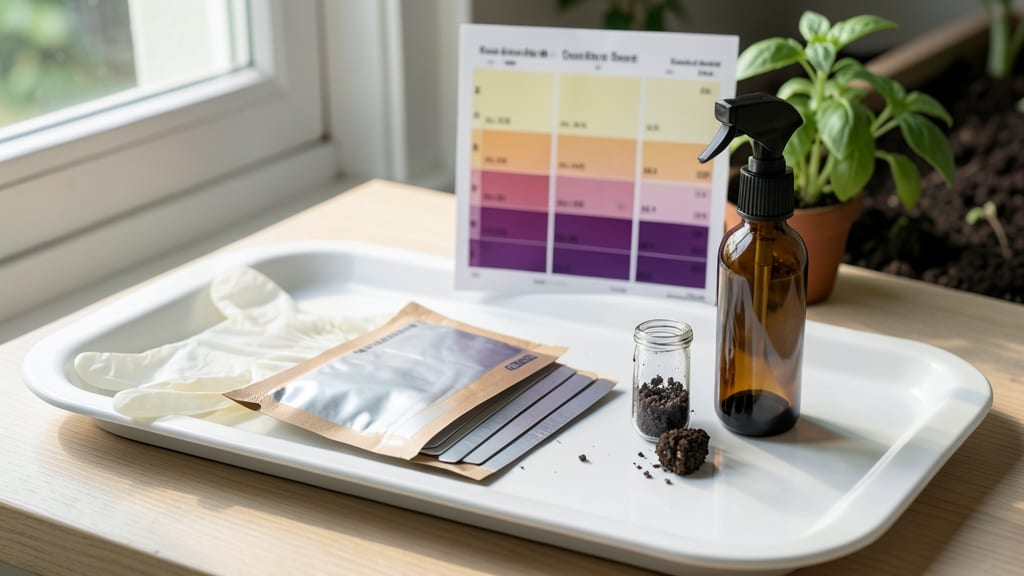
Soil test strips reveal what your plants need in five minutes—no lab fees or weeks of waiting. 🌱 I used to guess about soil pH and nutrients, leading to stunted plants and wasted fertilizer.
These strips changed that by giving me instant feedback on everything from acidity to essential minerals. The best part? You don’t need a green thumb to use them. Grab a sample of moist soil, dip the strip, wait 60 seconds, and compare the color to the chart.
Most kits test for pH, nitrogen, phosphorus, and potassium—the big four that determine whether your garden thrives or struggles. Once you know the results, you’ll see why your tomatoes keep wilting or why your lawn looks dull.
A quick adjustment—like adding lime for low pH or compost for low nitrogen—can turn things around in weeks. I’ve fixed more soil problems in a weekend than I did in years of trial and error. Retest after making changes to confirm progress.
These strips aren’t just quick—they’re the difference between a guess and a guaranteed harvest. Let’s get your soil dialed in!
📚 In This Guide
- What you need
- Instructions
- Tips and common mistakes
- Wrapping up and next steps
What you need
- ● Soil test strips – Choose a reliable brand (e.g., Luster Leaf or MySoil) that tests for pH, nitrogen (N), phosphorus (P), potassium (K), and micronutrients like calcium (Ca) or magnesium (Mg). Quantity: 1 pack (usually 25–50 strips).
- ● Fresh soil sample – Collect 1–2 cups of topsoil (0–6 inches deep) from 5–6 spots in your garden. Mix well in a clean container.
- ● Distilled water – ½ cup per test (tap water may skew results).
- ● Timer or smartphone – Most strips require 30–60 seconds for accurate readings.
- ● Color chart or app – Some strips include a guide; otherwise, use a soil test strip reader app (e.g., Soil pH Meter App) for precise color matching.
- ● Gloves – Protect your hands from dirt and chemicals.
- ● Small trowel or spoon – For easy soil collection.
- ● Notebook or spreadsheet – Record results by plant type/location for tracking.
- ● pH buffer solution – If testing alkaline or acidic soils, some kits include this for calibration.
- ● Humidity dome – Keeps strips moist longer if testing in dry conditions.
How to use soil test strips for fast plant health analysis
Here's my go-to method for getting instant soil insights—no lab wait times or complicated equipment.
🌱 Step 1: Collect a Representative Soil Sample
Grab a clean, dry container and dig down 4-6 inches in multiple spots around your garden bed or pot. Mix at least 4-6 small scoops together to average out any hotspots. Remove any visible debris like rocks or plant matter—just pure soil.
I like to collect samples after watering but before the soil dries completely. This gives you the most accurate snapshot of what your plants are actually experiencing. If your soil is clumpy, break it up gently with your fingers to create a fine, even texture before testing.
💧 Step 2: Prepare the Soil Test Strips
Read the instructions on your specific test strip package first—each brand may vary slightly. Most require you to moisten the strips with distilled water before applying to soil. Fill a small cup with distilled water (tap water can skew results) and carefully dip the strips until they're fully saturated but not dripping.
Shake off any excess water and lay the strips on a clean, dry surface. Here's the thing—don't touch the reactive pads with your fingers. Oils from your skin can contaminate the test results. Let them air-dry for 1-2 minutes until they feel slightly crisp but not brittle.
☀️ Step 3: Apply Strips to Soil and Wait
Press the prepared strips firmly into your mixed soil sample, making sure the reactive pads make full contact. I press down gently but firmly for 5-10 seconds to ensure good contact. For container gardens, I sometimes press the strips directly into the soil surface near plant roots for localized readings.
Most test strips give results in 30-60 seconds, but I always set a timer for 2 minutes to be safe. Watch for color changes—some strips show immediate results while others develop gradually. If you're testing multiple spots, label each strip with a pencil before applying to avoid confusion.
✂️ Step 4: Compare Colors to the Chart
Remove the strips carefully and lay them flat on a white surface or the provided color chart. Hold them up to natural light for the most accurate reading. Most charts show a gradient from low to high for each tested parameter like pH, nitrogen, phosphorus, and potassium.
I match the colors as closely as possible—some test strips have multiple shades between levels. For example, a pH strip might show a light green for slightly acidic, medium green for neutral, and dark green for alkaline. Don't guess between categories; even small differences matter for plant health.
🪴 Step 5: Interpret Results and Take Action
Compare your results to the ideal ranges for your specific plants. For example, blueberries need pH 4.5-5.5 while tomatoes thrive at 6.0-7.0. If your soil is deficient in nitrogen, you'll see that in the color development—this means it's time for a balanced fertilizer or compost top-dressing.
I keep a simple log of my test results by season. This helps me track improvements over time after amendments. For example, if my soil was too alkaline last spring, I can see if the sulfur treatment brought it down to the right range by fall. Quick tests like these save me from expensive lab reports while giving me actionable data.
Tips & tricks for perfect soil testing results
These quick tips will help you get the most accurate readings from your soil test strips—every time.
Sample Consistency: For the most reliable results in Step 1, focus on collecting soil from the root zone where plants actually grow. I avoid surface soil because it can be contaminated with mulch or fertilizer residues. If you're testing a large garden, divide it into sections and test each area separately—soil composition can vary dramatically even in the same yard. This ensures your test reflects what your plants are actually experiencing.
Distilled Water Matters: In Step 2, never skip using distilled water to moisten your strips. Tap water contains minerals that can interfere with the chemical reactions on the test pads, leading to false readings. I keep a small bottle of distilled water on hand specifically for soil testing. After dipping, gently tap the strips against the side of the cup to remove excess water—this prevents dilution of the soil sample when you apply them.
Timing is Everything: During Step 3, those 2 minutes of waiting can make all the difference. Some test strips develop color immediately, while others take the full time. I set a timer and check every 30 seconds after the initial 30-60 second window. If you're testing multiple parameters, use separate strips for each test to avoid cross-contamination between the reactive pads.
Lighting for Accuracy: When comparing colors in Step 4, natural daylight is your best friend. Fluorescent lighting can alter color perception, making your readings less accurate. I always test near a sunny window or take my strips outside for comparison. If you're working indoors, place a white piece of paper under the strips to create a consistent background—this helps you distinguish subtle color differences between test levels.
Pro Tips for Soil Test Strips
- These quick tips will help you get the most accurate readings from your soil test strips—every time.
- Sample Consistency: For the most reliable results in Step 1, focus on collecting soil from the root zone where plants actually grow.
- Distilled Water Matters: In Step 2, never skip using distilled water to moisten your strips.
Frequently asked questions
How accurate are soil test strips compared to lab tests?
Soil test strips provide a general idea of pH and nutrient levels (like nitrogen, phosphorus, and potassium) but aren’t as precise as lab tests. They’re great for quick diagnostics—ideal for gardeners who want to adjust soil on the fly—but for critical projects (like commercial farming), lab results are more reliable. Think of them as a snapshot, not a full report!
How long do the results last before they fade?
Most test strips change color immediately, but results should be read within 30 seconds to 2 minutes for accuracy. After that, colors may darken or blur, making it hard to compare against the chart. Pro tip: Take a photo of your strip right after testing—just in case!
Can I reuse soil test strips?
Nope! Test strips are single-use only. Reusing them can lead to cross-contamination or inaccurate readings. Once you’ve dipped, dipped, or dripped (yes, that’s a soil test strip verb), toss it in the trash. Keep a pack handy for retesting later if needed!
What if my test strip shows “normal” levels but my plants still look unhealthy?
Plants can suffer from hidden issues like poor drainage, compacted soil, or pests—even with “normal” test results. Double-check for other symptoms (yellowing leaves, wilting, or stunted growth) and consider testing for micronutrients (like iron or magnesium) separately. Sometimes, it’s not just the soil!
Are there cheaper alternatives to soil test strips?
DIY options like vinegar (for calcium) or baking soda (for acidity) can give you a rough idea, but they’re limited. For a budget-friendly upgrade, try digital pH meters (around $10–$20) or kit-based tests (like liquid reagents) for deeper insights. Test strips strike a great balance between cost and convenience!
Can I test soil in cold or frozen conditions?
Test strips work best with room-temperature soil (60–80°F). Cold or frozen soil can slow down reactions, leading to delayed or weak color changes. Let your soil sample sit at room temp for 15–30 minutes before testing. If it’s frozen, thaw it gently—no microwaving!
Wrapping up and next steps
Soil test strips are your fast, easy, and budget-friendly secret weapon for keeping your garden thriving! 🌱 With just a few minutes of your time, you can unlock the secrets of your soil’s health—no lab or guesswork required.
Whether you're a seasoned gardener or just starting out, these strips make it simple to act now and give your plants the perfect growing conditions.
Ready to take the next step? Grab a pack of test strips, pick your plants, and start testing today—your future harvest (or blooms!) will thank you! 🌿