
How To
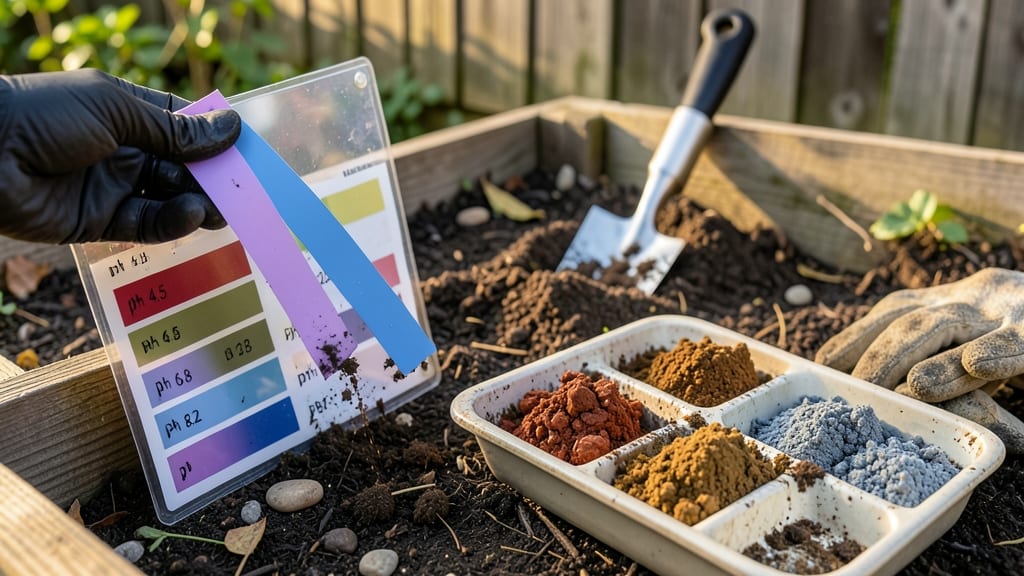
Soil pH tester strips reveal whether your garden soil is ready for planting—or needs serious adjustments before you even stick a seed in the ground. 🌱 I’ve used these strips for years to avoid the guesswork of adding lime or sulfur blindly, and they’ve saved me from killing plants with well-meaning but misguided amendments.
The best part? Results in under a minute, no lab fees or waiting periods.
Most strips work by dipping into a soil-water slurry, then comparing the color to a chart—think of it like a litmus test for your dirt. You’ll need a small container, distilled water, and a spoon for mixing.
The key is testing moist soil (not dry clumps) and following the brand’s timing instructions to the second, because even a few extra seconds can throw off the reading. I test before planting and again mid-season if I notice yellowing leaves or stunted growth.
If your results show a pH outside the ideal range for your plants—most vegetables prefer 6.0 to 7.0—you’ll adjust with amendments like crushed limestone (to raise pH) or elemental sulfur (to lower it).
A little goes a long way, so start with small amounts and retest in 4-6 weeks to avoid overcorrecting. My tomatoes thrived after I finally got their soil pH just right, and the difference in harvest size was shocking.
These strips aren’t perfect—they’re best for a quick snapshot, not a lab-grade analysis—but they’re the gardener’s equivalent of a home pregnancy test: simple, fast, and life-changing when you act on the results.
For the most accurate readings, test multiple spots in your garden, especially if you’ve had drainage issues or used heavy fertilizers in the past.
📚 In This Guide
- What you need
- Instructions
- Tips and common mistakes
- Wrapping up and next steps
What you need
- ● Soil pH tester strips – Choose a pack of 10-20 strips (preferably with a color-coded chart for easy reading). Brands like Luster Leaf or MySoil are great picks!
- ● Fresh soil sample – Collect 1-2 cups of topsoil (6 inches deep) from multiple spots in your garden or pot. Mix them together for an accurate reading.
- ● Small container or bag – A clean, dry plastic cup or ziplock bag to hold your soil sample.
- ● Spoon or trowel – For scooping soil (bonus points if it’s sterilized to avoid contamination!).
- ○ Water (optional but helpful) – A spray bottle or small cup to moisten dry soil if needed (some strips work best with damp soil).
- ● Timer or phone – To track the 30-60 seconds most strips need to react.
- ● pH adjustment kit – Includes lime (to raise pH) or sulfur (to lower pH) if you plan to tweak your soil’s acidity.
- ● Garden journal – To log pH levels over time and track changes in your soil’s health.
- ● Digital pH meter – For a backup check if you’re serious about precision (though strips are perfect for quick tests!).
- ● Gloves – To keep your hands clean while handling soil or chemicals.
How to use soil pH tester strips for accurate results
Skip the guesswork—these strips give you instant, reliable pH readings in seconds.
🌱 Step 1: Prepare Your Soil Sample
Grab a small trowel and dig a 2-inch deep hole in the area you want to test. Scoop out a ½ cup of soil—avoid the very top layer, which might be dry or contaminated. Remove any rocks, roots, or debris, then let the sample sit for 5 minutes to settle. This ensures you're testing the actual growing medium, not surface contaminants.
If your soil feels clumpy, break it up gently with your fingers. The goal is a loose, crumbly texture that mimics what plant roots actually encounter. Real talk: Wet soil is easier to handle, but don't add water unless your sample is bone-dry—extra moisture can skew results.
💧 Step 2: Moisten the Soil Sample
Place your ½ cup of soil in a clean, shallow container. Slowly add ¼ cup of distilled water (tap water can alter pH readings) and stir gently with a spoon until the mixture reaches a muddy consistency—think thick pancake batter. You want it damp enough to hold together when squeezed but not dripping wet.
Here's the thing—if your soil is already too dry, add water gradually. Over-moistening creates a runny slurry that won't work with the strips. The perfect texture lets the strip absorb soil particles evenly without falling apart when you dip it in. Test it by pressing your thumb into the mixture: it should hold a faint imprint but not crumble.
⏰ Step 3: Dip and Wait for Results
Remove one pH tester strip from its package and dip it into the soil-water mixture for 2-3 seconds. Hold it horizontally so the indicator pad soaks up soil evenly—don't press hard or you'll crush the reactive chemicals. Tap off any excess soil on the container's edge, then lay the strip flat on a clean, dry surface.
Wait exactly 30 seconds before comparing the strip to the color chart. I know it feels like forever, but rushing leads to inaccurate readings. The strip will change color—bright yellow for acidic, green for neutral, and purple for alkaline. Match it to the chart as closely as possible; even slight color differences can mean the difference between ideal and struggling plants.
🌿 Step 4: Interpret and Adjust
Compare your strip's color to the chart's pH scale (typically ranging from 3.0 to 10.0). Most vegetables thrive at 6.0-7.0, while blueberries need 4.5-5.5. If your reading is off by more than 0.5 points from your target, you'll need to amend the soil. For example, a 5.0 reading for tomatoes means adding lime to raise pH.
Don't panic if your first test is outside the ideal range—soil pH is easy to adjust with the right amendments. I always test 3 different spots in the garden to account for natural variations. Write down your results and revisit in 6-8 weeks after making changes to confirm your adjustments worked.
☀️ Step 5: Store Strips Properly
Keep unused strips in their original packaging, sealed tightly, and stored in a cool, dry place away from direct sunlight. Exposure to moisture or heat degrades the chemicals and gives false readings. I store mine in a small plastic container with a tight lid in my gardening shed—out of reach of kids and pets.
Use strips within 6 months of opening for best accuracy. Once opened, reseal the package immediately to prevent air exposure. Pro tip: Label the container with the purchase date so you remember when to replace them. Expired strips won't ruin your soil, but they'll give you misleading results that waste time and money on unnecessary amendments.
Tips & tricks for perfect soil pH testing
Common mistakes can throw off your results—here's how to get accurate readings every time.
Sample Depth Matters: The 2-inch depth in Step 1 is critical because surface soil often dries out or gets contaminated by mulch, fertilizer, or debris. If you're testing near a compost pile or where you've recently added amendments, dig slightly deeper to get a true reading of what your plants are actually experiencing. I've learned this the hard way after getting confusing results near my compost heap!
Consistency is Key: That 30-second wait in Step 3 isn't just arbitrary—it's when the chemical reaction completes. Set a timer! I used to rush and get inconsistent colors. For best results, work in a well-lit area where you can easily compare the strip to the color chart without squinting. Natural daylight works best for accurate color matching.
Test Multiple Spots: Soil pH varies dramatically even within small gardens. After testing 3 different spots in Step 4, I discovered my vegetable garden had a pH of 6.2 in one area and 7.1 just 5 feet away! This variation explains why some plants thrive while others struggle nearby. Always test both sunny and shady areas for complete accuracy.
Strip Storage Secrets: Heat and moisture are the strip's worst enemies. I keep my strips in a small plastic container with silica gel packets inside the lid to absorb any moisture. This simple trick extends their accuracy beyond the 6-month mark. Also, avoid storing them in the garage—temperature fluctuations can degrade the chemicals faster than you'd expect.
Pro Tips for Soil Ph Tester Strips
- Common mistakes can throw off your results—here's how to get accurate readings every time.
- Sample Depth Matters: The 2-inch depth in Step 1 is critical because surface soil often dries out or gets contaminated by mulch, fertilizer, or debris.
- Consistency is Key: That 30-second wait in Step 3 isn't just arbitrary—it's when the chemical reaction completes.
Frequently asked questions
Got questions about soil pH tester strips?
You’re not alone! Here are answers to the most common queries to help you get the most out of your soil testing—fast.
How accurate are soil pH tester strips compared to lab tests?
Soil pH strips provide a quick, reliable estimate (within ±0.5 pH units) for general gardening needs. Lab tests are more precise but take days. Strips are perfect for routine checks—ideal for adjusting soil amendments like lime or sulfur before investing in lab costs!
How long do the results last on the strip?
Results appear instantly (10–30 seconds), but the color fades over time. Compare the strip to the color chart within 30 seconds for accuracy. For best results, test fresh soil samples—don’t reuse strips!
Can I reuse soil pH tester strips?
Nope!
Each strip is single-use. Moisture, dirt, or repeated dipping can skew results. Toss used strips and grab a fresh one for each test. Pro tip: Keep strips in a dry, airtight container to preserve accuracy.
What if my soil pH is too high or low—how do I fix it?
Use these quick fixes:
- High pH (alkaline, >7.0): Add sulfur or peat moss (acid-loving plants like blueberries thrive here!).
- Low pH (acidic, <6.0): Sprinkle lime or wood ash (great for veggies and lawns).
What’s the best time to test soil pH?
Test in early spring or fall—when soil is moist but not waterlogged. Avoid testing right after fertilizing or heavy rain, as chemicals can temporarily alter pH. For container plants, test before planting to customize your growing mix!
Why did my strip turn a weird color? Troubleshooting tips:
If your strip looks muddy, faded, or inconsistent, try these fixes:
- Use distilled water (tap water can contain minerals that interfere).
- Rinse the soil sample to remove debris before dipping.
- Check the strip’s expiration date—old strips lose accuracy.
- Test in a clean container (no leftover chemicals or residues).
Wrapping up and next steps
Testing your soil’s pH with soil pH tester strips is a game-changer for gardeners and farmers alike—it’s quick, easy, and packed with actionable insights! 🌱 Whether you’re troubleshooting plant struggles or fine-tuning your garden’s health, these strips give you the power to make data-driven decisions without the hassle.
Now that you’re armed with the knowledge, grab a strip, test your soil, and let your green thumb shine! Ready to take it further? Try adjusting your soil’s pH with organic amendments like compost or lime, and watch your plants thrive!