
How To
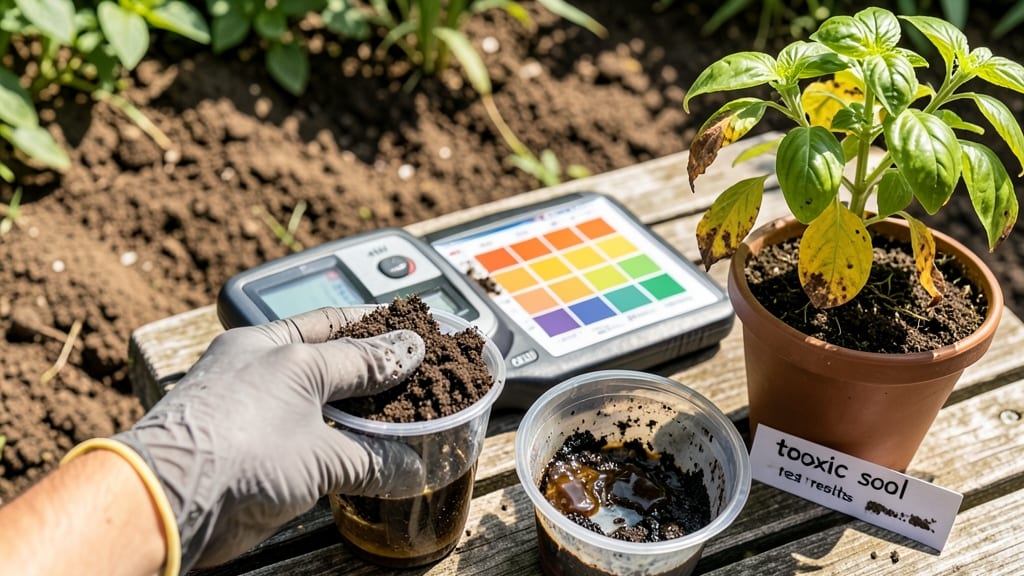
Your garden's hidden killer might be lurking right under your feet. 🌱 A soil toxicity test reveals what commercial soil tests miss—like heavy metals, pesticide residue, or harmful salts—that could stunt your plants or contaminate your food.
I learned this the hard way when my heirloom tomatoes grew stunted despite perfect care. The good news? You don’t need a lab to get answers.
Simple at-home kits test for lead, cadmium, and other contaminants in under 30 minutes, while DIY methods like pH strips and conductivity tests catch basic issues before they derail your harvest. Most problems have solutions—whether it’s flushing out salts with rainwater or amending soil with compost to bind heavy metals.
By the time you’re done, you’ll know exactly what’s safe to plant where. My soil now grows twice the yield of last year, and the peace of mind is worth every penny spent on tests. The key is acting before you plant—especially for vegetables you’ll eat.
This method works for any garden type, from raised beds to backyard plots. Let’s get your soil back to healthy—without the guesswork.
📚 In This Guide
- What you need
- Instructions
- Tips and common mistakes
- Wrapping up and next steps
What you need
- ● Soil sample: 1–2 cups (fresh, undisturbed soil from 4–6 inches deep)
- ● pH test kit: Digital or liquid test strips (e.g., Luster Leaf or API)
- ● Heavy metal test kit: MySoil or LaMotte test kit (for lead, arsenic, cadmium, etc.)
- ● Distilled water: 1 bottle (for rinsing and dilutions)
- ● Plastic containers: 2–3 small, clean containers with lids (for mixing samples)
- ● Spatula or spoon: 1 (non-metallic, for scooping soil)
- ● Plastic gloves: 1 pair (nitrile preferred for chemical safety)
- ● Notebook & pen: To record results and observations
- ● Magnifying glass: For inspecting soil texture and contaminants
- ● Sieve or mesh screen: To sift out debris before testing
- ● pH buffer solution: For calibrating your test kit
- ○ Digital scale: For precise soil sample measurements (optional but precise)
- ● Reference guide: Local soil health standards (check EPA or state resources)
How to test your soil for toxicity at home
Skip the expensive lab fees and get reliable results using simple household tests.
🧪 Step 1: Gather Your Basic Testing Supplies
You’ll need just four items: a clean plastic container, distilled water, a pH test kit (available at garden centers), and a small trowel. Grab a sample of your soil from 4-6 inches deep—this is where plant roots actually grow. Mix together 1 cup of soil with ½ cup of distilled water in your container. Stir well until it forms a thick, muddy slurry.
Distilled water is critical here—tap water contains minerals that skew results. If you don’t have distilled water, boil tap water for 5 minutes and let it cool before using. The mixture should look like wet sand; if it’s too dry, add a splash more water until it reaches a paste consistency.
🔍 Step 2: Check for Heavy Metals with the Vinegar Test
Pour ½ cup of white vinegar into a separate clean container. Add 1 tablespoon of your soil-water mixture and stir gently. Watch for fizzing or bubbling—this indicates high levels of calcium carbonate (limestone), which isn’t toxic but affects pH. Now, let it sit for 10 minutes. If the liquid turns dark brown, black, or has a metallic sheen, your soil may contain lead, copper, or zinc—common contaminants from old paint or industrial runoff.
For a second check, add ½ cup of hydrogen peroxide (3%) to another tablespoon of your soil mix. If it foams excessively or smells like rotten eggs, sulfur compounds (from decaying organic matter or pet waste) are present. These aren’t necessarily toxic but signal poor drainage or contamination. Rinse your container thoroughly between tests to avoid cross-contamination.
🌱 Step 3: Test pH Levels with a Reliable Kit
Use your pH test kit to measure the soil-water mixture you prepared earlier. Most kits include color-coded strips or a liquid comparator. Follow the instructions to determine the pH—ideal ranges are 6.0-7.0 for most vegetables, 5.0-6.0 for blueberries, and 7.0-8.0 for cacti and succulents. If your reading is below 5.0 or above 8.0, it’s either too acidic or alkaline, which can make plants unable to absorb nutrients properly.
To adjust pH, add elemental sulfur (for high pH) or lime (for low pH) sparingly. Test again in 2-3 weeks—overcorrecting can harm soil life. If your soil tests extremely acidic (below 4.5), it may contain aluminum toxicity, which stunts root growth. In this case, amend with wood ash (sparingly) or pelletized lime.
🚨 Step 4: Look for Visual and Sensory Clues
Examine your soil closely for brightly colored streaks, rusty spots, or chalky deposits. Rust-colored soil often means iron buildup, which can be toxic in excess. Chalky white patches suggest high salt content, likely from fertilizers or road runoff. Smell the soil—a strong chemical or petroleum odor indicates hydrocarbon contamination (from old fuel spills or paint). If you detect any of these, avoid growing edible crops in that area until professional remediation is done.
Dig deeper (literally) if you notice yellowing leaves with dark green veins on plants—this is a classic sign of manganese toxicity. For chlorosis (yellowing between veins), test for iron deficiency or zinc toxicity. Keep a garden journal to track which plants thrive or struggle in specific spots; this helps pinpoint localized issues.
⏰ Step 5: Interpret Results and Plan Amendments
Compare your findings to a soil health chart (available online from extension services). If tests show moderate contamination, focus on organic amendments like compost or worm castings to dilute toxins. For severe issues, consider container gardening with fresh, tested potting mix. Always rotate crops to prevent buildup of specific contaminants in one area.
Remember, no test is perfect—for edible gardens, send a sample to a certified lab if you suspect heavy metals. In the meantime, grow fast-growing, non-edible plants (like sunflowers or marigolds) in contaminated spots to bind heavy metals in the soil. Your at-home tests give you a solid starting point—now it’s time to act!
Tips & tricks for accurate soil toxicity testing
These simple strategies will help you get the most reliable results from your at-home soil tests.
Water Quality Matters: The 5-minute boiling time for tap water is non-negotiable—it removes minerals that would otherwise skew your pH readings. I've seen home gardeners skip this step and get false high-pH results because of calcium in their water. If you're in a hard water area, consider buying a small bottle of distilled water specifically for testing. The paste consistency of your soil-water mixture should be like wet sand; if it's too runny, your test results will be diluted and less accurate.
Timing is Everything: Those 10 minutes of sitting time in Step 2 are crucial for heavy metal detection. Don't rush this step—set a timer! I've seen people check too early and miss subtle color changes that indicate lead or copper. Work in a well-lit area where you can easily spot metallic sheens. If you're testing multiple soil samples, label your containers immediately to avoid confusion during the waiting period.
Visual Cues for Heavy Metals: When performing the vinegar test, look for three key indicators: dark brown/black color, metallic sheen, or any separation of liquids. The hydrogen peroxide test's rotten egg smell specifically points to sulfur compounds from decaying matter. I once tested soil near an old paint factory and saw a distinct black residue that turned out to be zinc contamination. Keep a small notebook handy to record these observations—they'll help you track patterns over time.
Interpreting pH Results: The ideal pH ranges (6.0-7.0 for vegetables) are just starting points—your specific plants may have different needs. For example, potatoes prefer slightly acidic soil (5.0-6.0), while asparagus thrives in neutral to alkaline (7.0-8.0). When adjusting pH, start with small amounts of sulfur or lime and retest in 2-3 weeks. I've seen gardeners overcorrect and end up with soil that's just as problematic as before, but in the opposite direction.
Pro Tips for Soil Toxicity Test
- These simple strategies will help you get the most reliable results from your at-home soil tests.
- Water Quality Matters: The 5-minute boiling time for tap water is non-negotiable—it removes minerals that would otherwise skew your pH readings.
- Timing is Everything: Those 10 minutes of sitting time in Step 2 are crucial for heavy metal detection.
Frequently asked questions
How long does it take to get results from a DIY soil toxicity test?
Most at-home soil toxicity kits (like those for lead, arsenic, or heavy metals) deliver results in 24 to 72 hours, depending on the method. Quick test strips or colorimetric kits may take as little as 10–30 minutes, while lab-style kits (requiring mailing samples) can take 1–2 weeks for processing. Always check the kit’s instructions for exact timing!
Are at-home soil toxicity tests as accurate as lab tests?
At-home tests are great for screening common contaminants (e.g., pH, lead, or pesticide residues), but they aren’t as precise as professional lab analysis. For critical decisions (like selling property or remediation), consider sending a sample to a certified lab for confirmation. Many kits include comparison charts to help interpret results.
What should I do if my soil test shows high toxicity levels?
Don’t panic! Start by identifying the contaminant (e.g., lead, arsenic, or chemicals) and research local remediation options. For heavy metals, you might need to remove and replace topsoil or use chelating agents. If pesticides or chemicals are the issue, contact your local agricultural extension office for guidance. Always wear gloves and a mask when handling contaminated soil.
Can I reuse test materials or kits for multiple samples?
It depends on the kit! Single-use test strips or reagent bottles should not be reused—they’re designed for one-time accuracy. However, some reusable test chambers or pH meters can be cleaned and reused for multiple samples. Always follow the manufacturer’s instructions to avoid cross-contamination or inaccurate readings.
What’s a good alternative if I can’t find a soil toxicity test kit?
If kits are unavailable, try these low-cost alternatives:
- pH testers: Affordable and widely available at garden centers.
- Visual soil checks: Dark, gummy soil may indicate organic matter overload; chalky soil could signal high pH.
- Local university extensions: Many offer discounted or free soil testing for residents.
- DIY lead testing: Use a lead test swab kit (for paint chips or dust) if you suspect lead contamination near old structures.
Wrapping up and next steps
Testing your soil for toxicity at home isn’t just empowering—it’s essential for healthy plants and safe gardening. With the right techniques and tools, you can accurately assess contaminants like lead, heavy metals, or chemical residues without breaking the bank.
Whether you’re a seasoned gardener or just starting, these insights help you take action confidently—whether that’s amending soil, choosing safer plants, or advocating for cleaner growing spaces.
Ready to put your findings to work? Start small:
- Swap out contaminated soil with compost or organic matter.
- Research plant varieties that thrive in your soil’s new conditions.
- Share your results with local gardening groups to spread awareness!